



Hello friends! Just wanted to let you know the move to the brand, spankin' new blog is officially complete! You can find me at
www.thesuburbanspoon.blogspot.com
New recipes, ideas, helpful hints, and general food nonsense are coming your way! I hope you take the time to check out the new site and follow me along on new food adventures!
Thursday, April 12, 2012


Friday, January 20, 2012
Peanut Butter Pretzel Bites
Over the holidays, I found and re-created this amazing little treat. It' a wonderful no-bake dessert for when you either don't want to bake something or are just too lazy and feel like mixing, rolling, and eating. :)
These little treats reminded me a lot of the Buckeyes that I made last year. The filling is really reminiscent of a Reese's Peanut Butter Cup, and that's ok in my book. One difference I noted was that on it's own, the filling is a little grittier than I'd thought it'd be. This is from the brown sugar that you mix in. However, DO NOT worry about that. Once the crunchy pretzel and chocolate meet that peanut butter filling, it's amazing and you don't even notice.
Also, because it was Christmas and I was feeling festive, I dressed these up with white chocolate. Obviously, it was completely unnecessary, but if you have it around and want it - have fun! :)

Peanut Butter Pretzel Bites
Yield 60 – 80 pretzel bites
1 cup creamy peanut butter
2 tbsp softened butter
1/2 cup powdered sugar (maybe more)
3/4 cup brown sugar (maybe more)
Pretzels
1 bag semi-sweet chocolate chips
white chocolate for unnecessary drizzling, optional
Combine peanut butter and softened butter in a large bowl with a fork or whisk, or in a stand mixer. Add the sugars and mix to combine. At this point if the filling will roll easily into balls without sticking to your hands you’re ready to go. If not, add a little more of each sugar until you reach a consistency that is easy to roll (I used about 3/4 cup of each sugar).
Use a teaspoon measure to scoop the filling. Roll each portion into a small ball, then sandwich them between two whole pretzels. When all the balls are rolled and successfully sandwiched, stick the whole tray in the freezer for about half an hour.
Pour the chocolate chips into a microwave safe bowl and heat at 30-second intervals, stirring occasionally until completely melted. Remove the pretzel sandwiches from the freezer and quickly dip each half-way into the melted chocolate. Return to the tray and repeat with remaining sandwiches. When all are dipped, return the tray to the freezer to set up completely. Drizzle with melted white chocolate. Store the sandwiches in the refrigerator until serving time.
Source: Two Tiny Kitchens
These little treats reminded me a lot of the Buckeyes that I made last year. The filling is really reminiscent of a Reese's Peanut Butter Cup, and that's ok in my book. One difference I noted was that on it's own, the filling is a little grittier than I'd thought it'd be. This is from the brown sugar that you mix in. However, DO NOT worry about that. Once the crunchy pretzel and chocolate meet that peanut butter filling, it's amazing and you don't even notice.
Also, because it was Christmas and I was feeling festive, I dressed these up with white chocolate. Obviously, it was completely unnecessary, but if you have it around and want it - have fun! :)

Peanut Butter Pretzel Bites
Yield 60 – 80 pretzel bites
1 cup creamy peanut butter
2 tbsp softened butter
1/2 cup powdered sugar (maybe more)
3/4 cup brown sugar (maybe more)
Pretzels
1 bag semi-sweet chocolate chips
white chocolate for unnecessary drizzling, optional
Combine peanut butter and softened butter in a large bowl with a fork or whisk, or in a stand mixer. Add the sugars and mix to combine. At this point if the filling will roll easily into balls without sticking to your hands you’re ready to go. If not, add a little more of each sugar until you reach a consistency that is easy to roll (I used about 3/4 cup of each sugar).
Use a teaspoon measure to scoop the filling. Roll each portion into a small ball, then sandwich them between two whole pretzels. When all the balls are rolled and successfully sandwiched, stick the whole tray in the freezer for about half an hour.
Pour the chocolate chips into a microwave safe bowl and heat at 30-second intervals, stirring occasionally until completely melted. Remove the pretzel sandwiches from the freezer and quickly dip each half-way into the melted chocolate. Return to the tray and repeat with remaining sandwiches. When all are dipped, return the tray to the freezer to set up completely. Drizzle with melted white chocolate. Store the sandwiches in the refrigerator until serving time.
Source: Two Tiny Kitchens
Thursday, January 19, 2012
Chocolate Crinkle Cookies
These cookies should really be called "The Easiest Cookies You'll Ever Make." Yes, they are that easy.
Rich and chocolatey with a slight crispy edge - mmmmMMM! Doesn't get much better than that!

Chocolate Crinkle Cookies
1 Box Devil's Food cake mix
2 eggs
1/3 C. vegetable oil
granulated sugar for coating
Preheat oven to 350 degrees.
In a large bowl, combine cake mix, egg, and oil until well blended. Batter/dough will be thick. Using a scoop, form 1 inch balls. Roll cookie balls into sugar to coat.
Place on a baking tray and bake for 8-10 minutes or until lightly puffed and tops are crinkled.
Source: Betty Crocker's Ultimate Cake Mix Cookbook
Rich and chocolatey with a slight crispy edge - mmmmMMM! Doesn't get much better than that!

Chocolate Crinkle Cookies
1 Box Devil's Food cake mix
2 eggs
1/3 C. vegetable oil
granulated sugar for coating
Preheat oven to 350 degrees.
In a large bowl, combine cake mix, egg, and oil until well blended. Batter/dough will be thick. Using a scoop, form 1 inch balls. Roll cookie balls into sugar to coat.
Place on a baking tray and bake for 8-10 minutes or until lightly puffed and tops are crinkled.
Source: Betty Crocker's Ultimate Cake Mix Cookbook
Monday, January 16, 2012
Scotcheroos
I first tried this amazing treat when a friend of mine was visiting his mother in Ionia, Iowa. He said that they were his favorite treat of his mother's and that I just had to try them. Of course, I tried them and was immediately hooked. They are sweet, chewy, and really decadent.
I begged and pleaded for the recipe. It took a little convincing, but I was able to get a lovely, handwritten recipe for my collection. This one is near and dear to my heart because I love recipes are aren't just found on the internet or a shiny new cookbook, but ones that are passed on and have real stories behind them.
I know this recipe has been used for years at bake sales, birthdays, and church picnics. The history behind this recipe is so rich that, although the ingredients are simple, the love shines through. Give these Scotheroos a try, you just might want to pack up and move to Iowa.

Scotheroos
(AKA - Special K Bars)
1 C. White Karo syrup
1 C. white sugar
1 1/3 C. peanut butter
6 C. Special K cereal (some say you can substitute rice krispies, but I was told this was strictly forbidden)
1 C. chocolate chips, melted
1 C. butterscotch chips, melted
Pour the Special K cereal into a large bowl and set aside.
Bring the syrup and sugar to a low bubble/boil and remove from heat. Add peanut butter and stir. Pour over the cereal and quickly mix together until well blended.
Spread in a 13X9 pan that has been sprayed with nonstick spray.
Melt together the chocolate and butterscotch chips. Pour over the cereal bars and spread evenly. Allow to cool.
Once cooled completely, you can flip the bars out onto the counter to cut evently or just cut right out of the pan - your choice!! Enjoy!
Source: a lovely kitchen in Ionia, IA
I begged and pleaded for the recipe. It took a little convincing, but I was able to get a lovely, handwritten recipe for my collection. This one is near and dear to my heart because I love recipes are aren't just found on the internet or a shiny new cookbook, but ones that are passed on and have real stories behind them.
I know this recipe has been used for years at bake sales, birthdays, and church picnics. The history behind this recipe is so rich that, although the ingredients are simple, the love shines through. Give these Scotheroos a try, you just might want to pack up and move to Iowa.

Scotheroos
(AKA - Special K Bars)
1 C. White Karo syrup
1 C. white sugar
1 1/3 C. peanut butter
6 C. Special K cereal (some say you can substitute rice krispies, but I was told this was strictly forbidden)
1 C. chocolate chips, melted
1 C. butterscotch chips, melted
Pour the Special K cereal into a large bowl and set aside.
Bring the syrup and sugar to a low bubble/boil and remove from heat. Add peanut butter and stir. Pour over the cereal and quickly mix together until well blended.
Spread in a 13X9 pan that has been sprayed with nonstick spray.
Melt together the chocolate and butterscotch chips. Pour over the cereal bars and spread evenly. Allow to cool.
Once cooled completely, you can flip the bars out onto the counter to cut evently or just cut right out of the pan - your choice!! Enjoy!
Source: a lovely kitchen in Ionia, IA
Sunday, January 15, 2012
Apple Pie Munchkins
Do you love pie? Do you wish you could have pie travel with you wherever you are - just in case you need an immediate pie intervention??
Really?! ME TOO!!
Here's the perfect solution....itty bitty apple pie munchkins. They're cute and easy to make and definitely help with cravings for some good ol' apple pie. I love that you can have a quick snack of 1 or 2 (or 12) pies whenever the mood strikes you. Plus, they're so cute that anyone you serve them to is bound to fall head over heels in love.

Apple Pie Munchkins
2 1/2 cups all-purpose flour
2 tbsp. granulated sugar
1 tsp. salt
2 sticks unsalted butter, cold and cut into small pieces
1/2 cup very cold water
2-3 medium apples (tart ones - like a Granny Smith
Squeeze of lemon juice
1/3 cup granulated sugar
1 tsp. ground cinnamon
Dash of grated nutmeg
Water
1 large egg lightly beaten with 1 teaspoon of water
Sugar, for sprinkling
To make the pie dough, combine the flour, sugar, and salt in a medium bowl and stir with a fork to blend. Using a pastry cutter (or a food processor), cut the butter into the flour mixture until the mixture is coarse and the largest pieces of butter are no bigger than small peas. Stir in the water and mix gently just until the dough has come together in a a cohesive ball and all of the dry ingredients have been moistened. Form the dough into a disc and cover tightly with plastic wrap. Transfer to the refrigerator and chill for at least 1 hour. (Or go ahead and buy the refrigerated stuff....hey, it works too!)
When you are ready to make your cookies, preheat the oven to 350˚ F. Line baking sheets with silicone baking mats or parchment paper. Peel the apples and cut off the sides in four large chunks, removing and discarding the cores. With each large piece of apple, dice the apple into a very find dice...a mince, if you will. Place the apples in a bowl and toss with the lemon juice. In another small bowl, combine the sugar, cinnamon, and nutmeg, and whisk to blend.
To assemble the cookies, transfer half of the chilled pie dough to a lightly floured work surface (keep the remaining half chilled). Use a rolling pin to roll the dough out very thin, about 1/8 to ¼-inch thick. Use a larger round biscuit or cookie cutter (about 2½ to 2¾ inches in diameter) to cut out rounds of the pie dough. Transfer half of the rounds to the prepared baking sheet. Brush the rounds lightly with water (this will help the pies seal). Take a few apple pieces at a time and coat them in the cinnamon-sugar mixture. Pile on top of a round of pie dough. Layer a second round of dough on top of each apple slice and gently press the edges to help seal. Repeat this process with the remaining dough and apples. Crimp and seal the edges of the mini pies with a fork, dipping in flour if needed to prevent sticking. Lightly brush the tops of the cookies with the egg wash. Use a small paring knife to cut tiny slits in the top of each cookie. Sprinkle with additional sugar, if desired.
Bake for 25-28 minutes or until light golden brown. Eat by the handful :)Source: Smitten Kitchen
Really?! ME TOO!!
Here's the perfect solution....itty bitty apple pie munchkins. They're cute and easy to make and definitely help with cravings for some good ol' apple pie. I love that you can have a quick snack of 1 or 2 (or 12) pies whenever the mood strikes you. Plus, they're so cute that anyone you serve them to is bound to fall head over heels in love.

Apple Pie Munchkins
2 1/2 cups all-purpose flour
2 tbsp. granulated sugar
1 tsp. salt
2 sticks unsalted butter, cold and cut into small pieces
1/2 cup very cold water
2-3 medium apples (tart ones - like a Granny Smith
Squeeze of lemon juice
1/3 cup granulated sugar
1 tsp. ground cinnamon
Dash of grated nutmeg
Water
1 large egg lightly beaten with 1 teaspoon of water
Sugar, for sprinkling
To make the pie dough, combine the flour, sugar, and salt in a medium bowl and stir with a fork to blend. Using a pastry cutter (or a food processor), cut the butter into the flour mixture until the mixture is coarse and the largest pieces of butter are no bigger than small peas. Stir in the water and mix gently just until the dough has come together in a a cohesive ball and all of the dry ingredients have been moistened. Form the dough into a disc and cover tightly with plastic wrap. Transfer to the refrigerator and chill for at least 1 hour. (Or go ahead and buy the refrigerated stuff....hey, it works too!)
When you are ready to make your cookies, preheat the oven to 350˚ F. Line baking sheets with silicone baking mats or parchment paper. Peel the apples and cut off the sides in four large chunks, removing and discarding the cores. With each large piece of apple, dice the apple into a very find dice...a mince, if you will. Place the apples in a bowl and toss with the lemon juice. In another small bowl, combine the sugar, cinnamon, and nutmeg, and whisk to blend.
To assemble the cookies, transfer half of the chilled pie dough to a lightly floured work surface (keep the remaining half chilled). Use a rolling pin to roll the dough out very thin, about 1/8 to ¼-inch thick. Use a larger round biscuit or cookie cutter (about 2½ to 2¾ inches in diameter) to cut out rounds of the pie dough. Transfer half of the rounds to the prepared baking sheet. Brush the rounds lightly with water (this will help the pies seal). Take a few apple pieces at a time and coat them in the cinnamon-sugar mixture. Pile on top of a round of pie dough. Layer a second round of dough on top of each apple slice and gently press the edges to help seal. Repeat this process with the remaining dough and apples. Crimp and seal the edges of the mini pies with a fork, dipping in flour if needed to prevent sticking. Lightly brush the tops of the cookies with the egg wash. Use a small paring knife to cut tiny slits in the top of each cookie. Sprinkle with additional sugar, if desired.
Bake for 25-28 minutes or until light golden brown. Eat by the handful :)Source: Smitten Kitchen
Thursday, January 12, 2012
Pimento Grilled Cheese
Hello, meet my friend, Pimento Grilled Cheese. He's the amazing, gooey, tangy, Southern gentleman cousin of your boring old grilled cheese. He's the grilled cheese you've been looking for your whole life.
Seriously, this sandwhich is amazing. Pimento cheese was first introduced to me as a dip...and even then it was good. Once I learned that in the south, it's used in all kinds of recipes, especially grilled cheese, I was really excited. It's fast, easy to keep in the fridge, and pretty versitile. give it a try and you just might think twice before making your next grilled cheese with your old boring cheese slices....
Keep in mind, the recipe below is for Pimento Cheese - you can use it as a dip, spread, etc. This version of the recipe makes about 8 (6 ounce) servings.

To make a grilled cheese:
Preheat a skillet to medium heat. Take 2 slices of bread and butter one side. On the non-buttered side, spread some pimento cheese. Slap them together and grill on the skillet until the bread is golden and the pimento cheese is melted.
Enjoy!
Seriously, this sandwhich is amazing. Pimento cheese was first introduced to me as a dip...and even then it was good. Once I learned that in the south, it's used in all kinds of recipes, especially grilled cheese, I was really excited. It's fast, easy to keep in the fridge, and pretty versitile. give it a try and you just might think twice before making your next grilled cheese with your old boring cheese slices....
Keep in mind, the recipe below is for Pimento Cheese - you can use it as a dip, spread, etc. This version of the recipe makes about 8 (6 ounce) servings.

Pimento Grilled Cheese
1 pound grated Cheddar
1/2 pound grated Pepper Jack
1 (4-ounce) can diced pimentos, with their juice
1/3 teaspoon granulated garlic
1/3 teaspoons granulated onion
About 1/2 teaspoon freshly ground black pepper
Pinch cayenne
About 1/2 tablespoon green chili sauce (optional)
2/3 cup mayonnaise
In a medium bowl, mix all ingredients well and refrigerate for 30 minutes.
1 pound grated Cheddar
1/2 pound grated Pepper Jack
1 (4-ounce) can diced pimentos, with their juice
1/3 teaspoon granulated garlic
1/3 teaspoons granulated onion
About 1/2 teaspoon freshly ground black pepper
Pinch cayenne
About 1/2 tablespoon green chili sauce (optional)
2/3 cup mayonnaise
In a medium bowl, mix all ingredients well and refrigerate for 30 minutes.
To make a grilled cheese:
Preheat a skillet to medium heat. Take 2 slices of bread and butter one side. On the non-buttered side, spread some pimento cheese. Slap them together and grill on the skillet until the bread is golden and the pimento cheese is melted.
Enjoy!
Monday, January 9, 2012
Gruyere Popovers
While watching Food Network's "The Best Thing I Ever Ate: Appetizers" I saw this gem. Tyler Florence said that these popovers from BLT Steak in NY where his personal favorite - and what a coincidence! I got a popover pan for Christmas!!
Ok, so it wasn't exactly a coincidence...I saw the episode, bought a popover pan, gave it to my husband and told him I'd act surprised on Christmas when I unwrapped it...yes, I made him wrap it. :) Truly though, you don't really need a popover pan. You could use a muffin tin, but you'd have more (and smaller) popovers - which might be nice for a party!
This recipe is so simple and very scrumptious. They are light and fluffy with a crispy, cheese top and a slight layer of gooey cheese in the middle. YUM!

4 C. milk, warmed
8 eggs
4 C. flour
1/2 heaping Tbs. salt
2 1/4 C. grated Gruyere
Place the popover pan in the oven. Heat the oven and pan to 350 degrees.
Gently warm the milk over low heat and set aside. Whisk the eggs until frothy and slowly whisk in the milk. Set the mixture aside.
Sift the flour and the salt together. Slowly add this dry mixture to the egg mixture and gently combine until mostly smooth.
Remove the popover pan from the oven and spray with non-stick spray.
While the batter is still slightly warm, fill each popover cup 3/4 full. Top with approximately 2 1/2 Tbs. of the grated cheese.
Bake at 350 degrees for 50 minutes or until the popovers are high and golden brown on the sides.
Take out of the oven, remove from pan and serve warm.
*Recipe from BLT Steak House via Food Network
Ok, so it wasn't exactly a coincidence...I saw the episode, bought a popover pan, gave it to my husband and told him I'd act surprised on Christmas when I unwrapped it...yes, I made him wrap it. :) Truly though, you don't really need a popover pan. You could use a muffin tin, but you'd have more (and smaller) popovers - which might be nice for a party!
This recipe is so simple and very scrumptious. They are light and fluffy with a crispy, cheese top and a slight layer of gooey cheese in the middle. YUM!

Gruyere Popovers
4 C. milk, warmed
8 eggs
4 C. flour
1/2 heaping Tbs. salt
2 1/4 C. grated Gruyere
Place the popover pan in the oven. Heat the oven and pan to 350 degrees.
Gently warm the milk over low heat and set aside. Whisk the eggs until frothy and slowly whisk in the milk. Set the mixture aside.
Sift the flour and the salt together. Slowly add this dry mixture to the egg mixture and gently combine until mostly smooth.
Remove the popover pan from the oven and spray with non-stick spray.
While the batter is still slightly warm, fill each popover cup 3/4 full. Top with approximately 2 1/2 Tbs. of the grated cheese.
Bake at 350 degrees for 50 minutes or until the popovers are high and golden brown on the sides.
Take out of the oven, remove from pan and serve warm.
*Recipe from BLT Steak House via Food Network
Sunday, January 8, 2012
Sweet Cinnamon Scones
A while ago, I found a really yummy sounding recipe for Sweet Cinnamon Scones. I was so eager to try it, but had a really hard time finding cinnamon baking chips in my grocery store. Thankfully, just before Christmas, they were in stock!
So thrilled and excited to make these, I got up on Christmas morning and made them for my family. Unfortunately, they were a total dud. :( All that waiting for nothing!! But, the idea still sounded really tastey to me and I decided not to give up. I went back to an old standby that's never let me down...America's Test Kitchen.
The recipe below is an adaptation of ATK's glazed, slightly-sweet cake scones with the cinnamon chips, some vanilla, and a touch of ground cinnamon mixed in. Keep in mind, these are cakey scones and less like traditional scones that have a similar texture to biscuits...but that's what I prefer. Plus, the addition of an egg makes them cakey but also allows them to stay fresher longer. :)
The results of adapting the recipe were exactly what I'd be hoping for! These scones are light, cakey, slightly sweet and have just the right amount of cinnamon. Do yourself a favor and give these a try. They freeze really well (pre-baked) and can be stored in the freezer until you are ready to pop them into the oven for a quick breakfast (or even a lighter dessert!!)
So thrilled and excited to make these, I got up on Christmas morning and made them for my family. Unfortunately, they were a total dud. :( All that waiting for nothing!! But, the idea still sounded really tastey to me and I decided not to give up. I went back to an old standby that's never let me down...America's Test Kitchen.
The recipe below is an adaptation of ATK's glazed, slightly-sweet cake scones with the cinnamon chips, some vanilla, and a touch of ground cinnamon mixed in. Keep in mind, these are cakey scones and less like traditional scones that have a similar texture to biscuits...but that's what I prefer. Plus, the addition of an egg makes them cakey but also allows them to stay fresher longer. :)
The results of adapting the recipe were exactly what I'd be hoping for! These scones are light, cakey, slightly sweet and have just the right amount of cinnamon. Do yourself a favor and give these a try. They freeze really well (pre-baked) and can be stored in the freezer until you are ready to pop them into the oven for a quick breakfast (or even a lighter dessert!!)

Sweet Cinnamon Scones
2 C. all purpose flour
1 T. baking poweder
3 T. sugar
1/2 tsp. salt
1/2 tsp. cinnamon
4 T. very cold butter, cut into 1/4 inch cubes
1/2 C. cinnamon baking chips
3/4 C. heavy cream, plus more for brushing – about 1 Tb.
1 egg, lightly beaten
1 tsp. vanilla
For the cinnamon-sugar topping:
1 Tb. cream
1 T. sugar
1 tsp. cinnamon
Heat oven to 425 degrees.
Place the flour, baking powder, sugar, salt and cinnamon in the bowl of a food processor. Process with six 1-second pulses, until combined.
Pour the dry ingredients into a large bowl. Add the cinnamon chips to the dry ingredients and mix to combine. Stir in the egg, vanilla, and heavy cream with a rubber spatula or fork until the dough begins to form, about 30 seconds.
Transfer the dough and any remaining dry flour bits to a countertop that has been lightly dusted with flour. Knead the dough by hand just until it comes together – do not over knead!
Lightly dust an 8-inch cake pan. Press the dough evenly into the cake pan. Turn the dough out on to the countertop. (You should have a nice, flat, and even disk to work with!) Cut into 8 equal wedges. (At this point you can flash freeze the wedges in the freezer for 20 minutes. Then put them in a ziplock bag and freeze until needed).
Place wedges on a lightly greased baking sheet. Brush the tops of the scones with the 1 T. of heavy cream. Sprinkle with sugar and cinnamon. Bake at 425 degrees for 12 to 15 minutes or until the tops are light brown. Cool on a wire rack for 10 minutes (ATK recommends truly letting the scones sit for the 10 minutes. It firms them up and improves their overall texture).
Serve warm or at room temperature. Enjoy with coffee or tea!
Saturday, December 31, 2011
Cheese Ravioli with Butternut Squash
WOW! It's almost 2012 and I still haven't seen any snow stick to the ground this winter. Today, on New Year's Eve, it's almost 50 degrees! Unbelievable!! Definitely still feels like fall...
With that mindset, I made this really fast and delicious Cheese Ravioli with Butternut Squash. It reminded me of fall with it's smooth and toasty flavors and was simple enough to be made for a quick lunch. Hurry! Make this before it starts feeling like winter again! :)

Cheese Ravioli with Butternut Squash
Serves 4
2 Tbsp olive oil
1/2 medium butternut squash (about 1 lb), peeled and cut into 1/2-in. pieces
Kosher salt and pepper
2 cloves garlic, thinly sliced
1 Tbsp small fresh thyme sprigs
1 16-oz pkg cheese ravioli (fresh or frozen) - I prefer fresh goat-cheese ravioli
1/4 cup grated Parmesan
Heat the oil in a large nonstick skillet over medium heat. Add the squash, season
with 1/2 tsp salt and 1/4 tsp pepper and cook, covered, stirring occasionally, for 8 minutes. Add the garlic and thyme and cook, uncovered, tossing occasionally, until the squash is tender and beginning to brown, 2 to 3 minutes more.
Meanwhile, cook the ravioli according to package directions. Transfer the ravioli to plates, top with the squash mixture and sprinkle with the Parmesan.
With that mindset, I made this really fast and delicious Cheese Ravioli with Butternut Squash. It reminded me of fall with it's smooth and toasty flavors and was simple enough to be made for a quick lunch. Hurry! Make this before it starts feeling like winter again! :)

Cheese Ravioli with Butternut Squash
Serves 4
2 Tbsp olive oil
1/2 medium butternut squash (about 1 lb), peeled and cut into 1/2-in. pieces
Kosher salt and pepper
2 cloves garlic, thinly sliced
1 Tbsp small fresh thyme sprigs
1 16-oz pkg cheese ravioli (fresh or frozen) - I prefer fresh goat-cheese ravioli
1/4 cup grated Parmesan
Heat the oil in a large nonstick skillet over medium heat. Add the squash, season
with 1/2 tsp salt and 1/4 tsp pepper and cook, covered, stirring occasionally, for 8 minutes. Add the garlic and thyme and cook, uncovered, tossing occasionally, until the squash is tender and beginning to brown, 2 to 3 minutes more.
Meanwhile, cook the ravioli according to package directions. Transfer the ravioli to plates, top with the squash mixture and sprinkle with the Parmesan.
Monday, December 26, 2011
Fig and Ham Foccacianini
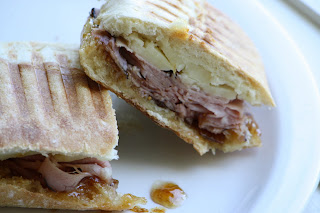
I LOVE sandwiches. I mean, who doesn't? Carbo-loading with delicious ingredients and the options are endless. Although, I will admit, sometimes I get stuck in a PB & J rut. Recently, I started watching "Next Food Network Star" and loving Jeff Mauro. He won last season (oops...do I have to say "spoiler alert" if the info is a year old??) and his recipes are really creative and interesting when it comes to composing a yummy sandwich.
Here, I adapted one of his panini recipes and it turned out delicious. It combines the traditional flavors of ham and cheese with a unique twist - using sharp Italian cheese and fig spread to make it out of this world.
To make this recipe even faster and easier, feel free to use prepared (read: store bought) fig spread. IF you've got the time, I included the recipe for homemade fig spread.
Ingredients
Fig Spread:
2 cups dried figs, stems removed and halved
3/4 cups balsamic vinegar
1 teaspoon sugar
4 squares focaccia bread
8 ounces Italian sharp cheese, such as Fontinella, or asiago, sliced
1 pound black forest ham, thinly sliced
Olive oil, for brushing
For the fig spread: Bring the figs, 1 cup water, balsamic and sugar to a simmer in a small pot. Simmer until the figs rehydrate and the liquid reduces and thickens, about 15 minutes. Let cool. Once cool, place in a food processor and puree until smooth, 20 to 30 seconds.
For the sandwich: Preheat a griddle over medium-low heat or heat a panini press. Slice 1 focaccia square in half. Place a thin layer of the fig spread on the inside of both halves. Place a couple slices of cheese on the bottom, and then place 4 ounces ham on top. Close and lightly brush the bread with olive oil. Griddle the sandwich until golden and warm, about 4 minutes a side. Repeat with the remaining ingredients.
Recipe adapted from "The Sandwich King" Jeff Mauro
Here, I adapted one of his panini recipes and it turned out delicious. It combines the traditional flavors of ham and cheese with a unique twist - using sharp Italian cheese and fig spread to make it out of this world.
To make this recipe even faster and easier, feel free to use prepared (read: store bought) fig spread. IF you've got the time, I included the recipe for homemade fig spread.

Ingredients
Fig Spread:
2 cups dried figs, stems removed and halved
3/4 cups balsamic vinegar
1 teaspoon sugar
4 squares focaccia bread
8 ounces Italian sharp cheese, such as Fontinella, or asiago, sliced
1 pound black forest ham, thinly sliced
Olive oil, for brushing
For the fig spread: Bring the figs, 1 cup water, balsamic and sugar to a simmer in a small pot. Simmer until the figs rehydrate and the liquid reduces and thickens, about 15 minutes. Let cool. Once cool, place in a food processor and puree until smooth, 20 to 30 seconds.
For the sandwich: Preheat a griddle over medium-low heat or heat a panini press. Slice 1 focaccia square in half. Place a thin layer of the fig spread on the inside of both halves. Place a couple slices of cheese on the bottom, and then place 4 ounces ham on top. Close and lightly brush the bread with olive oil. Griddle the sandwich until golden and warm, about 4 minutes a side. Repeat with the remaining ingredients.
Recipe adapted from "The Sandwich King" Jeff Mauro
Friday, December 23, 2011
Pan-fried Potatoes and Green Beens
This is one of those side dishes that always brings me back to summer barbeques in my parents' backyard. This is a really simple, easy side dish that goes well with all sorts of main dishes. It can be grilled in the summer or made indoors during cold winter months.

Pan-fried Potatoes and Green Beens
3-4 potatoes, sliced thinly (any will work, I really like Yukon golds)
1 red onion, sliced thinly
3 cups fresh green beans, trimmed and cut into large pieces
4 Tablespoons butter
salt and pepper, to taste.
In a large cast-iron skillet, melt the butter. Add the potatoes and cook until just beginning to become tender (about 5 minutes). Add the remaining ingredients and season to taste. Cook until the veggies are tender-crisp and the potatoes have a nice, brown crust on them. (To get this crust, move them as little as possible - allow that cast iron skillet to work its magic!) about 6-7 minutes more. Serve alongside your favorite main course!
Enjoy!

Pan-fried Potatoes and Green Beens
3-4 potatoes, sliced thinly (any will work, I really like Yukon golds)
1 red onion, sliced thinly
3 cups fresh green beans, trimmed and cut into large pieces
4 Tablespoons butter
salt and pepper, to taste.
In a large cast-iron skillet, melt the butter. Add the potatoes and cook until just beginning to become tender (about 5 minutes). Add the remaining ingredients and season to taste. Cook until the veggies are tender-crisp and the potatoes have a nice, brown crust on them. (To get this crust, move them as little as possible - allow that cast iron skillet to work its magic!) about 6-7 minutes more. Serve alongside your favorite main course!
Enjoy!
Thursday, December 22, 2011
One-Minute Nutella Cake
Throughout the blogosphere, I've discovered the joys of "One-Minute" microwave cakes. My tastebuds danced in delight (as my waistline grew weary!). These cakes are truly amazing. They're little one-pot wonders that help curb even the most intense dessert craving.
This dessert combines one of my favorite ingredients - Nutella, with a moist and delicious cake. I could eat this every night of my life!

One-Minute Nutella Cake
4 tablespoons self-raising flour
3 tablespoons cocoa powder
3 tablespoons nutella
3 tablespoons skim milk
1 tablespoon sugar
1 tablespoon vegetable or canola oil
1 egg
Nonstick Spray
Combine all ingredients in a small bowl. Whisk lightly with a fork until combined and smooth. Pour into an oversized microwave safe mug or ramekin that has been sprayed with nonstick spray.
Microwave for a minute watching as the cake rises in the mug, stopping if it is about to overflow and continuing a couple of times for 10 second intervals till cooked. [Don't be tempted to overcook. The cake virtually finishes cooking in that first 1 minute rise]
Enjoy!
This dessert combines one of my favorite ingredients - Nutella, with a moist and delicious cake. I could eat this every night of my life!

One-Minute Nutella Cake
4 tablespoons self-raising flour
3 tablespoons cocoa powder
3 tablespoons nutella
3 tablespoons skim milk
1 tablespoon sugar
1 tablespoon vegetable or canola oil
1 egg
Nonstick Spray
Combine all ingredients in a small bowl. Whisk lightly with a fork until combined and smooth. Pour into an oversized microwave safe mug or ramekin that has been sprayed with nonstick spray.
Microwave for a minute watching as the cake rises in the mug, stopping if it is about to overflow and continuing a couple of times for 10 second intervals till cooked. [Don't be tempted to overcook. The cake virtually finishes cooking in that first 1 minute rise]
Enjoy!
Wednesday, December 21, 2011
One-Minute Peanut Butter Cake
Not to be outdone by "One Minute Nutella Cake," this peanut butter cake screams decadence. It's rich, creamy, and oh-so-peanut-buttery. This is for the true peanut butter lover.
Go ahead. Indulge - you deserve it...and no one's watching! :)

One-Minute Peanut Butter Cake
1 egg, slightly beaten
1 tablespoon brown sugar
1/2 teaspoon baking powder
1 heaping tablespoon flour
2 heaping tablespoons peanut butter
1 teaspoon milk
1 tablespoon powdered sugar (give or take)
Directions:
In a small bowl, whisk together egg, brown sugar, baking powder, peanut butter and flour. Pour batter into a greased ramekin. Microwave for 30 seconds.
While the cake is microwaving, stir together milk and powdered sugar, adding more powdered sugar if necessary to thicken frosting. **This step is optional...I actually preferred the cake without the icing, but my husband like it with....totally up to you!
Remove cake from ramekin (or don’t), pour frosting over top.
Enjoy!
Go ahead. Indulge - you deserve it...and no one's watching! :)

One-Minute Peanut Butter Cake
1 egg, slightly beaten
1 tablespoon brown sugar
1/2 teaspoon baking powder
1 heaping tablespoon flour
2 heaping tablespoons peanut butter
1 teaspoon milk
1 tablespoon powdered sugar (give or take)
Directions:
In a small bowl, whisk together egg, brown sugar, baking powder, peanut butter and flour. Pour batter into a greased ramekin. Microwave for 30 seconds.
While the cake is microwaving, stir together milk and powdered sugar, adding more powdered sugar if necessary to thicken frosting. **This step is optional...I actually preferred the cake without the icing, but my husband like it with....totally up to you!
Remove cake from ramekin (or don’t), pour frosting over top.
Enjoy!
Tuesday, December 20, 2011
Praline-Pecan Banana Bread
I often have to hide bananas into desserts - particularly breads, since my husband doesn't really like them. However, I'm slowly breaking his will by increasing the banana flavors in truly amazing dishes. This is definitely one of them.
The banana flavor is pronounced, but not overwhelming here. What really makes this dessert shine and brings them coming back for more, is the Praline-Pecan topping that's poured over the bread before it's baked. The flavor seeps into the bread and permeates throughout while creating a sweet crust on top.
You will never look at banana bread the same way again!

Praline-Pecan Banana Bread
2 cups all-purpose flour
1/2 cup light brown sugar
1 1/4 teaspoons baking powder
1/4 teaspoon baking soda
1/4 teaspoon salt
1 Cup Praline-Pecan Sauce
3 ripe large bananas, mashed
2 large eggs, lightly beaten
1/2 cup (113 grams) unsalted butter, melted and cooled
1/3 cup Sour Cream
1 teaspoon pure vanilla extract
Preheat oven to 350 degrees F and place the rack in the center of the oven. Butter the bottom and sides of an 8-cup loaf pan. Set aside.
In a large bowl combine the flour, sugar, baking powder, baking soda, and salt.
In a medium-sized bowl combine the mashed bananas, eggs, melted butter, sour cream, 3/4 C of Praline sauce, and vanilla. With a rubber spatula or wooden spoon, lightly fold the wet ingredients (banana mixture) into the dry ingredients until just combined and the batter is thick and chunky. (The important thing is not to over mix the batter. Over mixing the batter will yield a tough, rubbery bread.)
Scrape the batter into the prepared pan and pour the remaining 1/4 cup of Praline sauce over the top of the batter. Bake until bread is golden brown and a toothpick inserted in the center comes out clean, 50 - 60 minutes. Place on a wire rack to cool and then remove the bread from the pan. Serve warm or at room temperature.
Makes one - 9 inch loaf
*If you do not have or can't find Praline-Pecan sauce, you can substitute caramel sauce and add pecans.
Pecan-Praline Sauce
2 cups unsalted butter, cubed
1 1/2 cups chopped pecans
3 pounds light brown sugar
1 1/2 cups heavy whipping cream
1/2 teaspoon cinnamon
2 1/2 cups sour cream
1 1/2 teaspoons vanilla extract
Heat 1 cup of the butter in a large saucepan until melted. Add the pecans and mix well. Bring to a boil. Cook until the pecans begin to change color. Be careful! This mixture will foam over, so use a large saucepan.
Add the remaining 1 cup butter and mix well. This will cool the pecan mixture and stop the cooking process. Remove from heat.
Combine brown sugar, whipping cream and cinnamon in a saucepan and mix well. Cook over low heat until blended, stirring constantly; increase heat. Cook to 230 degrees on a candy thermometer. Stir in pecan mixture. Add sour cream and vanilla and mix well. Remove from heat.
**Just remember this makes a LOT of praline sauce - probably more like 12 cups. However, it freezes amazingly well and keeps that way for a long LONG time. :)
The banana flavor is pronounced, but not overwhelming here. What really makes this dessert shine and brings them coming back for more, is the Praline-Pecan topping that's poured over the bread before it's baked. The flavor seeps into the bread and permeates throughout while creating a sweet crust on top.
You will never look at banana bread the same way again!

Praline-Pecan Banana Bread
2 cups all-purpose flour
1/2 cup light brown sugar
1 1/4 teaspoons baking powder
1/4 teaspoon baking soda
1/4 teaspoon salt
1 Cup Praline-Pecan Sauce
3 ripe large bananas, mashed
2 large eggs, lightly beaten
1/2 cup (113 grams) unsalted butter, melted and cooled
1/3 cup Sour Cream
1 teaspoon pure vanilla extract
Preheat oven to 350 degrees F and place the rack in the center of the oven. Butter the bottom and sides of an 8-cup loaf pan. Set aside.
In a large bowl combine the flour, sugar, baking powder, baking soda, and salt.
In a medium-sized bowl combine the mashed bananas, eggs, melted butter, sour cream, 3/4 C of Praline sauce, and vanilla. With a rubber spatula or wooden spoon, lightly fold the wet ingredients (banana mixture) into the dry ingredients until just combined and the batter is thick and chunky. (The important thing is not to over mix the batter. Over mixing the batter will yield a tough, rubbery bread.)
Scrape the batter into the prepared pan and pour the remaining 1/4 cup of Praline sauce over the top of the batter. Bake until bread is golden brown and a toothpick inserted in the center comes out clean, 50 - 60 minutes. Place on a wire rack to cool and then remove the bread from the pan. Serve warm or at room temperature.
Makes one - 9 inch loaf
*If you do not have or can't find Praline-Pecan sauce, you can substitute caramel sauce and add pecans.
Pecan-Praline Sauce
2 cups unsalted butter, cubed
1 1/2 cups chopped pecans
3 pounds light brown sugar
1 1/2 cups heavy whipping cream
1/2 teaspoon cinnamon
2 1/2 cups sour cream
1 1/2 teaspoons vanilla extract
Heat 1 cup of the butter in a large saucepan until melted. Add the pecans and mix well. Bring to a boil. Cook until the pecans begin to change color. Be careful! This mixture will foam over, so use a large saucepan.
Add the remaining 1 cup butter and mix well. This will cool the pecan mixture and stop the cooking process. Remove from heat.
Combine brown sugar, whipping cream and cinnamon in a saucepan and mix well. Cook over low heat until blended, stirring constantly; increase heat. Cook to 230 degrees on a candy thermometer. Stir in pecan mixture. Add sour cream and vanilla and mix well. Remove from heat.
**Just remember this makes a LOT of praline sauce - probably more like 12 cups. However, it freezes amazingly well and keeps that way for a long LONG time. :)
Friday, July 22, 2011
Crockpot BBQ Chicken
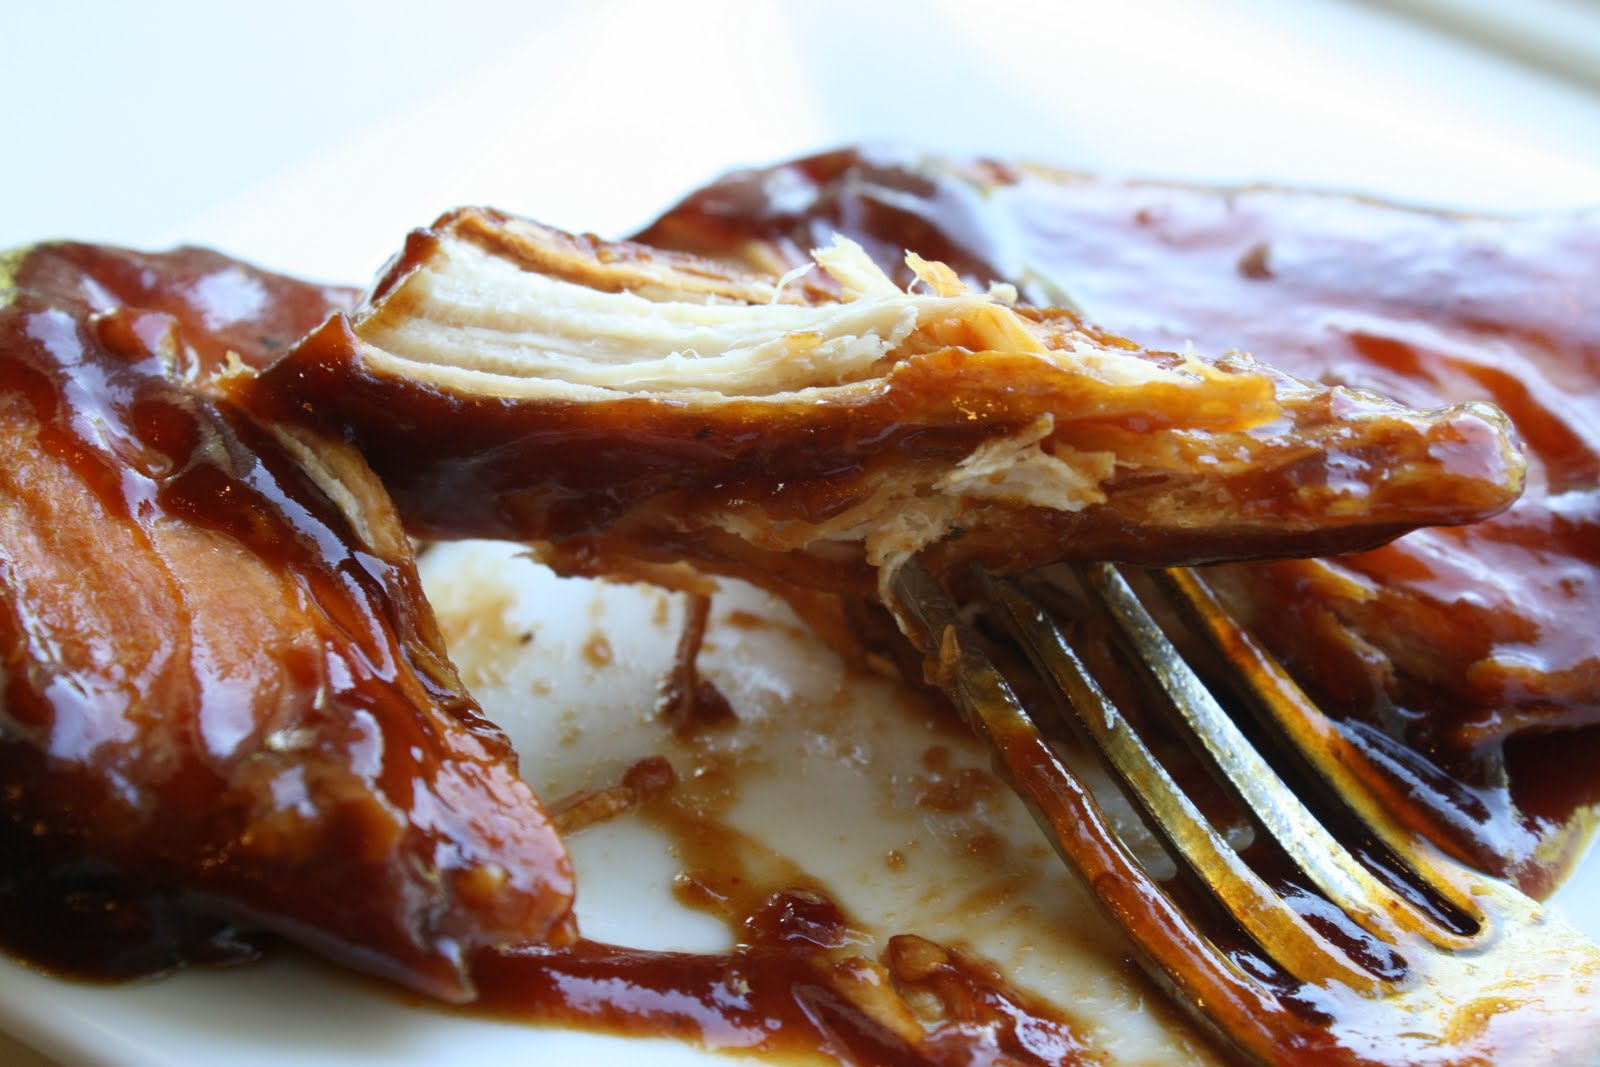
Don't feel like messing with dinner this weekend? Yeah, me neither. I feel like every cook needs a recipe like this in his/her repertoire. Some days, I really don't feel like cooking...or we have a lot going on....or I don't feel like it... :) No matter the reason, there can still be a warm, delicious meal waiting for you and your family.
This recipe is a Crockpot recipe, so it's not exactly fast, but it couldn't be any easier. You can even forget to start it until the afternoon and have a delicious and moist BBQ chicken dinner waiting for you. You can eat it any way you want- alone, on sandwiches, etc. I hope you enjoy it as much as we did!

Crockpot BBQ chicken
4-6 pieces boneless skinless chicken breasts, fresh or frozen
1 bottle BBQ sauce (I used Sweet Baby Ray's and it was amazing!)
1/4 c vinegar
1 tsp. red pepper flakes
1/4 c brown sugar
1/2 - 1 tsp. garlic powder
Mix BBQ sauce with all ingredients listed under it. Place chicken in Crockpot. Pour sauce over it and cook on LOW for 4-6 hours. You pretty much don't even have to stir it... how easy is that!?
This recipe is a Crockpot recipe, so it's not exactly fast, but it couldn't be any easier. You can even forget to start it until the afternoon and have a delicious and moist BBQ chicken dinner waiting for you. You can eat it any way you want- alone, on sandwiches, etc. I hope you enjoy it as much as we did!
Crockpot BBQ chicken
4-6 pieces boneless skinless chicken breasts, fresh or frozen
1 bottle BBQ sauce (I used Sweet Baby Ray's and it was amazing!)
1/4 c vinegar
1 tsp. red pepper flakes
1/4 c brown sugar
1/2 - 1 tsp. garlic powder
Mix BBQ sauce with all ingredients listed under it. Place chicken in Crockpot. Pour sauce over it and cook on LOW for 4-6 hours. You pretty much don't even have to stir it... how easy is that!?
Sunday, July 3, 2011
Seven Layer Magic Bars
These bars are truly MAGIC!! They are a classic pot-luck and party treat that combines layers of sweet, salty, creamy goodness. They are truly simple and always a crowd-pleaser. Chocolate chips, butterscotch, and coconut are all caramelized and melt together on a crispy graham crust.

Seven Layer Magic Bars
yield: about 24 bars
No-Stick Cooking Spray
3 cups graham cracker crumbs (chocolate grahams will also work here! YUM!)
1 cup butter, melted (2 sticks)
1 (14 oz.) can Sweetened Condensed Milk
1 cup butterscotch-flavored chips
1 cup semi-sweet chocolate chips
1 1/3 cups flaked coconut
1 cup chopped nuts
HEAT oven 350°F. Spray 13 x 9-inch baking pan with no-stick cooking spray.
COMBINE graham cracker crumbs and butter; mix well. Press crumb mixture firmly into bottom of prepared pan. Pour 3/4 of the sweetened condensed milk evenly over crumb mixture.
In a bowl, mix together all other ingredients, reserving 1/3 Cup of coconut. Spread evenly over the condensed milk and press down firmly. Top with remaining sweetened condensed milk. Top with 1/3 cup of coconut and press down firmly.
Bake 25 to 30 minutes or until lightly browned. Loosen from sides of pan while still warm; cool on wire rack. Cut into bars or diamonds.
**For perfectly cut cookie bars, line entire pan with foil, extending foil over edge of pan. Coat lightly with no-stick cooking spray. After bars have baked and cooled, lift up by edges of foil to remove from pan. Cut into individual bars.

Seven Layer Magic Bars
yield: about 24 bars
No-Stick Cooking Spray
3 cups graham cracker crumbs (chocolate grahams will also work here! YUM!)
1 cup butter, melted (2 sticks)
1 (14 oz.) can Sweetened Condensed Milk
1 cup butterscotch-flavored chips
1 cup semi-sweet chocolate chips
1 1/3 cups flaked coconut
1 cup chopped nuts
HEAT oven 350°F. Spray 13 x 9-inch baking pan with no-stick cooking spray.
COMBINE graham cracker crumbs and butter; mix well. Press crumb mixture firmly into bottom of prepared pan. Pour 3/4 of the sweetened condensed milk evenly over crumb mixture.
In a bowl, mix together all other ingredients, reserving 1/3 Cup of coconut. Spread evenly over the condensed milk and press down firmly. Top with remaining sweetened condensed milk. Top with 1/3 cup of coconut and press down firmly.
Bake 25 to 30 minutes or until lightly browned. Loosen from sides of pan while still warm; cool on wire rack. Cut into bars or diamonds.
**For perfectly cut cookie bars, line entire pan with foil, extending foil over edge of pan. Coat lightly with no-stick cooking spray. After bars have baked and cooled, lift up by edges of foil to remove from pan. Cut into individual bars.
Thursday, June 23, 2011
Fruit-Filled Puff Pastry Donuts with Lemon Glaze
Are you looking for a simple, delicious way to elevate a donut? This recipe is it! It's called a donut but could also be called a popover. It also really reminded me of a toaster pastry only more fresh and flaky.
Using store-bought puff pastry, this breakfast treat comes together quickly and is definitely kid and adult friendly!

Fruit-Filled Puff Pastry Donuts with Lemon Glaze
Makes about 9 donuts
1 egg
1 Tablespoon water
1 package (17.3 ounces) Pepperidge Farm Puff Pastry Sheets, thawed
Cut-up fruit, such as strawberries, bananas, raspberries, blueberries, etc. (I used strawberries and blackberries)
Sugar
Lemon glaze:
1/4 cup lemon juice
1 cup confectioners' sugar
To make the lemon glaze, combine ingredients in a bowl and whisk together. The consistency should be slightly thick but runny. Set aside.
Preheat the oven to 400 degrees. Beat the egg and water in a small bowl with a fork; Set aside. Unfold 1 pastry sheet on a lightly floured surface. Using a round cutter, cut the pastry sheet into 9 (3-inch) circles. Repeat with the remaining pastry sheet. (Don’t waste the scraps – re-roll them and cut into as many circles as possible)
Place half of the pastry circles onto a parchment lined baking sheet. Top each with a small amount of cut-up fruit and top fruit with a pinch (about 1/8 teaspoon) sugar. Brush the edges of the pastry circles with the egg wash. Place the remaining pastry circles over the filling. Press the edges firmly to seal and crimp edges with a fork. Using a sharp knife or a pair of kitchen shears, cut two small slits in the top of each filled pastry.
Bake for 15 minutes or until the pastries are golden brown on the top and the bottoms. Let the pastries cool slightly and drizzle the lemon glaze, or simply shake confectioners sugar, over the tops.
Adapted slightly from The Comforts of Cooking
Using store-bought puff pastry, this breakfast treat comes together quickly and is definitely kid and adult friendly!

Fruit-Filled Puff Pastry Donuts with Lemon Glaze
Makes about 9 donuts
1 egg
1 Tablespoon water
1 package (17.3 ounces) Pepperidge Farm Puff Pastry Sheets, thawed
Cut-up fruit, such as strawberries, bananas, raspberries, blueberries, etc. (I used strawberries and blackberries)
Sugar
Lemon glaze:
1/4 cup lemon juice
1 cup confectioners' sugar
To make the lemon glaze, combine ingredients in a bowl and whisk together. The consistency should be slightly thick but runny. Set aside.
Preheat the oven to 400 degrees. Beat the egg and water in a small bowl with a fork; Set aside. Unfold 1 pastry sheet on a lightly floured surface. Using a round cutter, cut the pastry sheet into 9 (3-inch) circles. Repeat with the remaining pastry sheet. (Don’t waste the scraps – re-roll them and cut into as many circles as possible)
Place half of the pastry circles onto a parchment lined baking sheet. Top each with a small amount of cut-up fruit and top fruit with a pinch (about 1/8 teaspoon) sugar. Brush the edges of the pastry circles with the egg wash. Place the remaining pastry circles over the filling. Press the edges firmly to seal and crimp edges with a fork. Using a sharp knife or a pair of kitchen shears, cut two small slits in the top of each filled pastry.
Bake for 15 minutes or until the pastries are golden brown on the top and the bottoms. Let the pastries cool slightly and drizzle the lemon glaze, or simply shake confectioners sugar, over the tops.
Adapted slightly from The Comforts of Cooking
Monday, June 20, 2011
Chocolate Peanut Butter No-Bake "Cake"
This traditional "ice box cake" couldn't be easier or more surprising! As I was searching through old food magazines, I came across this recipe that peaked my interested. It's visually impressive and no one would know that the "cake" in this is really chocolate graham crackers! Truly, it looks and tastes like cake that's been expertly and painstakingly sliced to perfection.
The original recipe serves 8-10, but I very easily doubled it for a party - the only change I made was to line up the two "cakes" and frost them together.
I highly recommend making your own whipped frostings here, as it gives the cake a more special flavor. If you're looking for something that's simple and just needs to be assembled and sit in the fridge until you're ready for it - here's your recipe!

Chocolate Peanut Butter No-Bake "Cake"
serves about 8-10
2 cups heavy cream, divided
1/2 cup peanut butter chips
1/2 cup milk chocolate chips
12 whole chocolate graham crackers
optional garnish: chocolate jimmies
In a small saucepan, over low heat, combine 1/4 cup of the cream and the peanut butter chips, stirring just until melted and smooth: pour into a bowl. Repeat with the milk chocolate chips and another 1/4 cup of the cream; pour into another bowl. Refrigerate both about 15 minutes until cook, but not firm.
In a medium bowl, with mixer on high speed, beat remaining cream just until stiff. Gently fold half of the whipped cream into peanut butter mixture, 1/2 cup at a time. Fold remaining whipped cream into the chocolate mixture, 1/2 cup at a time. Refrigerate milk chocolate whipped cream.
Spread each of 10 whole chocolate graham crackers with about 2-1/2 tablespoons of the peanut butter whipped cream. Sandwich together coated crackers to form 2 stacks (5 cookies per stack). Top each stack with 1 plain graham cracker. Arrange stacks, side by side, on a serving plate, long edges touching. Frost with milk chocolate whipped cream.
Refrigerate 6 hours or overnight for cookies to soften into "cake". To serve, garnish with chocolate jimmies.

The original recipe serves 8-10, but I very easily doubled it for a party - the only change I made was to line up the two "cakes" and frost them together.
I highly recommend making your own whipped frostings here, as it gives the cake a more special flavor. If you're looking for something that's simple and just needs to be assembled and sit in the fridge until you're ready for it - here's your recipe!

Chocolate Peanut Butter No-Bake "Cake"
serves about 8-10
2 cups heavy cream, divided
1/2 cup peanut butter chips
1/2 cup milk chocolate chips
12 whole chocolate graham crackers
optional garnish: chocolate jimmies
In a small saucepan, over low heat, combine 1/4 cup of the cream and the peanut butter chips, stirring just until melted and smooth: pour into a bowl. Repeat with the milk chocolate chips and another 1/4 cup of the cream; pour into another bowl. Refrigerate both about 15 minutes until cook, but not firm.
In a medium bowl, with mixer on high speed, beat remaining cream just until stiff. Gently fold half of the whipped cream into peanut butter mixture, 1/2 cup at a time. Fold remaining whipped cream into the chocolate mixture, 1/2 cup at a time. Refrigerate milk chocolate whipped cream.
Spread each of 10 whole chocolate graham crackers with about 2-1/2 tablespoons of the peanut butter whipped cream. Sandwich together coated crackers to form 2 stacks (5 cookies per stack). Top each stack with 1 plain graham cracker. Arrange stacks, side by side, on a serving plate, long edges touching. Frost with milk chocolate whipped cream.
Refrigerate 6 hours or overnight for cookies to soften into "cake". To serve, garnish with chocolate jimmies.

Thursday, May 26, 2011
Double Chocolate Chip Cupcakes
I came across this recipe years ago and I am still amazed at how simple, moist, and decadent this cake is. Even though it's not "from scratch" (hey, it's still homemade!) I think it's by far my favorite chocolate cake recipe.
The cake is incredibly moist and chocolatey while the extra chocolate chips add richness and even more fun! This time, I made cupcakes with the recipe, but you can also use this to make 2 9" cake rounds. It's amazing and so simple that you'd be crazy not to give it a try!

Double Chocolate Chip Cupcakes
1 box devil’s food cake mix
1 small pkg Jello instant chocolate pudding mix
1 cup sour cream
1 cup vegetable oil
4 eggs, beaten
1/2 cup milk
1 tsp vanilla
2 cups mini chocolate chips, plus more for decorating
Preheat oven to 350 degrees F. In a very large bowl, mix together everything except chocolate chips. Batter will be thick. Stir in the chocolate chips. Pour batter into cupcake tins with linters. For cooking time, I use the cooking times on the back of the devil’s food cake box as a guide and usually add 5-10 mins to whatever it says. Then I do the toothpick check, and if it’s not done, I check on it every 5 mins after that.
Allow to cool and then frost with Vanilla Buttercream frosting and sprinkle with extra mini chocolate chips.
The cake is incredibly moist and chocolatey while the extra chocolate chips add richness and even more fun! This time, I made cupcakes with the recipe, but you can also use this to make 2 9" cake rounds. It's amazing and so simple that you'd be crazy not to give it a try!

Double Chocolate Chip Cupcakes
1 box devil’s food cake mix
1 small pkg Jello instant chocolate pudding mix
1 cup sour cream
1 cup vegetable oil
4 eggs, beaten
1/2 cup milk
1 tsp vanilla
2 cups mini chocolate chips, plus more for decorating
Preheat oven to 350 degrees F. In a very large bowl, mix together everything except chocolate chips. Batter will be thick. Stir in the chocolate chips. Pour batter into cupcake tins with linters. For cooking time, I use the cooking times on the back of the devil’s food cake box as a guide and usually add 5-10 mins to whatever it says. Then I do the toothpick check, and if it’s not done, I check on it every 5 mins after that.
Allow to cool and then frost with Vanilla Buttercream frosting and sprinkle with extra mini chocolate chips.
Monday, May 23, 2011
Slow Cooked Pork with Green Chilies and Tomatillos
This recipe is again from a cooking class hosted by Qdoba. This pork is used for traditional street tacos and is so flavorful and tender that it's unbelievable. It also happens to be insanely simple, which makes me happy.
If you are looking for a new twist on tacos and are tired of chicken or steak, look no further. This pork was definitely a crowd pleaser and any leftovers would be great in a variety of recipes that call for pulled pork.

Slow Cooked Pork with Green Chilies and Tomatillos
1 boneless pork shoulder roast
1 white onion, cut into thin strips
2 Poblano Chilies, cut into thin strips
2 Jalapeno Chilies, cut into thin strips
2 Anaheim or Hatch Green Chilies, cut into thin strips
2 C. Tomatillos, cut into large chunks
3 cloves fresh garlic, smashed
1 T. Salt
1/2 tsp. garlic powder
1/2 tsp. black pepper
Place the onions in the bottom of a slow cooker. Top with half of the tomatillos. Place the pork roast into the slow cooker and sprinkle with salt and garlic powder. Add remaining tomatillos. Top with all of the chilies.
Cook on low for a minimum of 6 hours. (The idea is to cook the pork slowly so that it is fork tender)
After 6 hours, the pork will be fork tender and ready to shred. If necessary, remove any fat prior to shredding.
Using tongs or your hands, shred the pork into taco sized pieces. Add pepper and additional salt to taste.
Serve with fresh, warm tortillas and your favorite taco toppings (I suggest the traditional topper of cilantro, red onion, and lime juice.)
If you are looking for a new twist on tacos and are tired of chicken or steak, look no further. This pork was definitely a crowd pleaser and any leftovers would be great in a variety of recipes that call for pulled pork.

Slow Cooked Pork with Green Chilies and Tomatillos
1 boneless pork shoulder roast
1 white onion, cut into thin strips
2 Poblano Chilies, cut into thin strips
2 Jalapeno Chilies, cut into thin strips
2 Anaheim or Hatch Green Chilies, cut into thin strips
2 C. Tomatillos, cut into large chunks
3 cloves fresh garlic, smashed
1 T. Salt
1/2 tsp. garlic powder
1/2 tsp. black pepper
Place the onions in the bottom of a slow cooker. Top with half of the tomatillos. Place the pork roast into the slow cooker and sprinkle with salt and garlic powder. Add remaining tomatillos. Top with all of the chilies.
Cook on low for a minimum of 6 hours. (The idea is to cook the pork slowly so that it is fork tender)
After 6 hours, the pork will be fork tender and ready to shred. If necessary, remove any fat prior to shredding.
Using tongs or your hands, shred the pork into taco sized pieces. Add pepper and additional salt to taste.
Serve with fresh, warm tortillas and your favorite taco toppings (I suggest the traditional topper of cilantro, red onion, and lime juice.)
Subscribe to:
Posts (Atom)


