Showing posts with label dessert. Show all posts

Friday, January 20, 2012

Peanut Butter Pretzel Bites

Over the holidays, I found and re-created this amazing little treat. It' a wonderful no-bake dessert for when you either don't want to bake something or are just too lazy and feel like mixing, rolling, and eating. :)

These little treats reminded me a lot of the Buckeyes that I made last year. The filling is really reminiscent of a Reese's Peanut Butter Cup, and that's ok in my book. One difference I noted was that on it's own, the filling is a little grittier than I'd thought it'd be. This is from the brown sugar that you mix in. However, DO NOT worry about that. Once the crunchy pretzel and chocolate meet that peanut butter filling, it's amazing and you don't even notice.

Also, because it was Christmas and I was feeling festive, I dressed these up with white chocolate. Obviously, it was completely unnecessary, but if you have it around and want it - have fun! :)


Peanut Butter Pretzel Bites

Yield 60 – 80 pretzel bites

1 cup creamy peanut butter
2 tbsp softened butter
1/2 cup powdered sugar (maybe more)
3/4 cup brown sugar (maybe more)
Pretzels

1 bag semi-sweet chocolate chips
white chocolate for unnecessary drizzling, optional

Combine peanut butter and softened butter in a large bowl with a fork or whisk, or in a stand mixer. Add the sugars and mix to combine. At this point if the filling will roll easily into balls without sticking to your hands you’re ready to go. If not, add a little more of each sugar until you reach a consistency that is easy to roll (I used about 3/4 cup of each sugar).

Use a teaspoon measure to scoop the filling. Roll each portion into a small ball, then sandwich them between two whole pretzels. When all the balls are rolled and successfully sandwiched, stick the whole tray in the freezer for about half an hour.

Pour the chocolate chips into a microwave safe bowl and heat at 30-second intervals, stirring occasionally until completely melted. Remove the pretzel sandwiches from the freezer and quickly dip each half-way into the melted chocolate. Return to the tray and repeat with remaining sandwiches. When all are dipped, return the tray to the freezer to set up completely. Drizzle with melted white chocolate. Store the sandwiches in the refrigerator until serving time.

Source: Two Tiny Kitchens

Monday, January 16, 2012

Scotcheroos

I first tried this amazing treat when a friend of mine was visiting his mother in Ionia, Iowa. He said that they were his favorite treat of his mother's and that I just had to try them. Of course, I tried them and was immediately hooked. They are sweet, chewy, and really decadent.

I begged and pleaded for the recipe. It took a little convincing, but I was able to get a lovely, handwritten recipe for my collection. This one is near and dear to my heart because I love recipes are aren't just found on the internet or a shiny new cookbook, but ones that are passed on and have real stories behind them.

I know this recipe has been used for years at bake sales, birthdays, and church picnics. The history behind this recipe is so rich that, although the ingredients are simple, the love shines through. Give these Scotheroos a try, you just might want to pack up and move to Iowa.


Scotheroos
(AKA - Special K Bars)

1 C. White Karo syrup
1 C. white sugar
1 1/3 C. peanut butter
6 C. Special K cereal (some say you can substitute rice krispies, but I was told this was strictly forbidden)
1 C. chocolate chips, melted
1 C. butterscotch chips, melted

Pour the Special K cereal into a large bowl and set aside.

Bring the syrup and sugar to a low bubble/boil and remove from heat. Add peanut butter and stir. Pour over the cereal and quickly mix together until well blended.

Spread in a 13X9 pan that has been sprayed with nonstick spray.

Melt together the chocolate and butterscotch chips. Pour over the cereal bars and spread evenly. Allow to cool.

Once cooled completely, you can flip the bars out onto the counter to cut evently or just cut right out of the pan - your choice!! Enjoy!

Source: a lovely kitchen in Ionia, IA

Sunday, January 15, 2012

Apple Pie Munchkins

Do you love pie? Do you wish you could have pie travel with you wherever you are - just in case you need an immediate pie intervention??

Really?! ME TOO!!

Here's the perfect solution....itty bitty apple pie munchkins. They're cute and easy to make and definitely help with cravings for some good ol' apple pie. I love that you can have a quick snack of 1 or 2 (or 12) pies whenever the mood strikes you. Plus, they're so cute that anyone you serve them to is bound to fall head over heels in love.


Apple Pie Munchkins

2 1/2 cups all-purpose flour
2 tbsp. granulated sugar
1 tsp. salt
2 sticks unsalted butter, cold and cut into small pieces
1/2 cup very cold water
2-3 medium apples (tart ones - like a Granny Smith

Squeeze of lemon juice
1/3 cup granulated sugar
1 tsp. ground cinnamon
Dash of grated nutmeg
Water
1 large egg lightly beaten with 1 teaspoon of water
Sugar, for sprinkling

To make the pie dough, combine the flour, sugar, and salt in a medium bowl and stir with a fork to blend. Using a pastry cutter (or a food processor), cut the butter into the flour mixture until the mixture is coarse and the largest pieces of butter are no bigger than small peas. Stir in the water and mix gently just until the dough has come together in a a cohesive ball and all of the dry ingredients have been moistened. Form the dough into a disc and cover tightly with plastic wrap. Transfer to the refrigerator and chill for at least 1 hour. (Or go ahead and buy the refrigerated stuff....hey, it works too!)

When you are ready to make your cookies, preheat the oven to 350˚ F. Line baking sheets with silicone baking mats or parchment paper. Peel the apples and cut off the sides in four large chunks, removing and discarding the cores. With each large piece of apple, dice the apple into a very find dice...a mince, if you will. Place the apples in a bowl and toss with the lemon juice. In another small bowl, combine the sugar, cinnamon, and nutmeg, and whisk to blend.

To assemble the cookies, transfer half of the chilled pie dough to a lightly floured work surface (keep the remaining half chilled). Use a rolling pin to roll the dough out very thin, about 1/8 to ¼-inch thick. Use a larger round biscuit or cookie cutter (about 2½ to 2¾ inches in diameter) to cut out rounds of the pie dough. Transfer half of the rounds to the prepared baking sheet. Brush the rounds lightly with water (this will help the pies seal). Take a few apple pieces at a time and coat them in the cinnamon-sugar mixture. Pile on top of a round of pie dough. Layer a second round of dough on top of each apple slice and gently press the edges to help seal. Repeat this process with the remaining dough and apples. Crimp and seal the edges of the mini pies with a fork, dipping in flour if needed to prevent sticking. Lightly brush the tops of the cookies with the egg wash. Use a small paring knife to cut tiny slits in the top of each cookie. Sprinkle with additional sugar, if desired.

Bake for 25-28 minutes or until light golden brown. Eat by the handful :)Source: Smitten Kitchen

Sunday, January 8, 2012

Sweet Cinnamon Scones

A while ago, I found a really yummy sounding recipe for Sweet Cinnamon Scones. I was so eager to try it, but had a really hard time finding cinnamon baking chips in my grocery store. Thankfully, just before Christmas, they were in stock!

So thrilled and excited to make these, I got up on Christmas morning and made them for my family. Unfortunately, they were a total dud. :( All that waiting for nothing!! But, the idea still sounded really tastey to me and I decided not to give up. I went back to an old standby that's never let me down...America's Test Kitchen.

The recipe below is an adaptation of ATK's glazed, slightly-sweet cake scones with the cinnamon chips, some vanilla, and a touch of ground cinnamon mixed in. Keep in mind, these are cakey scones and less like traditional scones that have a similar texture to biscuits...but that's what I prefer. Plus, the addition of an egg makes them cakey but also allows them to stay fresher longer. :)

The results of adapting the recipe were exactly what I'd be hoping for! These scones are light, cakey, slightly sweet and have just the right amount of cinnamon. Do yourself a favor and give these a try. They freeze really well (pre-baked) and can be stored in the freezer until you are ready to pop them into the oven for a quick breakfast (or even a lighter dessert!!)


Sweet Cinnamon Scones

2 C. all purpose flour
1 T. baking poweder
3 T. sugar
1/2 tsp. salt
1/2 tsp. cinnamon
4 T. very cold butter, cut into 1/4 inch cubes
1/2 C. cinnamon baking chips
3/4 C. heavy cream, plus more for brushing – about 1 Tb.
1 egg, lightly beaten
1 tsp. vanilla

For the cinnamon-sugar topping:
1 Tb. cream
1 T. sugar
1 tsp. cinnamon

Heat oven to 425 degrees.

Place the flour, baking powder, sugar, salt and cinnamon in the bowl of a food processor. Process with six 1-second pulses, until combined.

Pour the dry ingredients into a large bowl. Add the cinnamon chips to the dry ingredients and mix to combine. Stir in the egg, vanilla, and heavy cream with a rubber spatula or fork until the dough begins to form, about 30 seconds.

Transfer the dough and any remaining dry flour bits to a countertop that has been lightly dusted with flour. Knead the dough by hand just until it comes together – do not over knead!

Lightly dust an 8-inch cake pan. Press the dough evenly into the cake pan. Turn the dough out on to the countertop. (You should have a nice, flat, and even disk to work with!) Cut into 8 equal wedges. (At this point you can flash freeze the wedges in the freezer for 20 minutes. Then put them in a ziplock bag and freeze until needed).

Place wedges on a lightly greased baking sheet. Brush the tops of the scones with the 1 T. of heavy cream. Sprinkle with sugar and cinnamon. Bake at 425 degrees for 12 to 15 minutes or until the tops are light brown. Cool on a wire rack for 10 minutes (ATK recommends truly letting the scones sit for the 10 minutes. It firms them up and improves their overall texture).

Serve warm or at room temperature. Enjoy with coffee or tea!

Thursday, December 22, 2011

One-Minute Nutella Cake

Throughout the blogosphere, I've discovered the joys of "One-Minute" microwave cakes. My tastebuds danced in delight (as my waistline grew weary!). These cakes are truly amazing. They're little one-pot wonders that help curb even the most intense dessert craving.

This dessert combines one of my favorite ingredients - Nutella, with a moist and delicious cake. I could eat this every night of my life!


One-Minute Nutella Cake

4 tablespoons self-raising flour
3 tablespoons cocoa powder
3 tablespoons nutella
3 tablespoons skim milk
1 tablespoon sugar
1 tablespoon vegetable or canola oil
1 egg
Nonstick Spray

Combine all ingredients in a small bowl. Whisk lightly with a fork until combined and smooth. Pour into an oversized microwave safe mug or ramekin that has been sprayed with nonstick spray.

Microwave for a minute watching as the cake rises in the mug, stopping if it is about to overflow and continuing a couple of times for 10 second intervals till cooked. [Don't be tempted to overcook. The cake virtually finishes cooking in that first 1 minute rise]

Enjoy!

Wednesday, December 21, 2011

One-Minute Peanut Butter Cake

Not to be outdone by "One Minute Nutella Cake," this peanut butter cake screams decadence. It's rich, creamy, and oh-so-peanut-buttery. This is for the true peanut butter lover.

Go ahead. Indulge - you deserve it...and no one's watching! :)


One-Minute Peanut Butter Cake

1 egg, slightly beaten
1 tablespoon brown sugar
1/2 teaspoon baking powder
1 heaping tablespoon flour
2 heaping tablespoons peanut butter
1 teaspoon milk
1 tablespoon powdered sugar (give or take)

Directions:

In a small bowl, whisk together egg, brown sugar, baking powder, peanut butter and flour. Pour batter into a greased ramekin. Microwave for 30 seconds.

While the cake is microwaving, stir together milk and powdered sugar, adding more powdered sugar if necessary to thicken frosting. **This step is optional...I actually preferred the cake without the icing, but my husband like it with....totally up to you!

Remove cake from ramekin (or don’t), pour frosting over top.

Enjoy!

Tuesday, December 20, 2011

Praline-Pecan Banana Bread

I often have to hide bananas into desserts - particularly breads, since my husband doesn't really like them. However, I'm slowly breaking his will by increasing the banana flavors in truly amazing dishes. This is definitely one of them.

The banana flavor is pronounced, but not overwhelming here. What really makes this dessert shine and brings them coming back for more, is the Praline-Pecan topping that's poured over the bread before it's baked. The flavor seeps into the bread and permeates throughout while creating a sweet crust on top.

You will never look at banana bread the same way again!


Praline-Pecan Banana Bread

2 cups all-purpose flour
1/2 cup light brown sugar
1 1/4 teaspoons baking powder
1/4 teaspoon baking soda
1/4 teaspoon salt
1 Cup Praline-Pecan Sauce
3 ripe large bananas, mashed
2 large eggs, lightly beaten
1/2 cup (113 grams) unsalted butter, melted and cooled
1/3 cup Sour Cream
1 teaspoon pure vanilla extract

Preheat oven to 350 degrees F and place the rack in the center of the oven. Butter the bottom and sides of an 8-cup loaf pan. Set aside.

In a large bowl combine the flour, sugar, baking powder, baking soda, and salt.

In a medium-sized bowl combine the mashed bananas, eggs, melted butter, sour cream, 3/4 C of Praline sauce, and vanilla. With a rubber spatula or wooden spoon, lightly fold the wet ingredients (banana mixture) into the dry ingredients until just combined and the batter is thick and chunky. (The important thing is not to over mix the batter. Over mixing the batter will yield a tough, rubbery bread.)

Scrape the batter into the prepared pan and pour the remaining 1/4 cup of Praline sauce over the top of the batter. Bake until bread is golden brown and a toothpick inserted in the center comes out clean, 50 - 60 minutes. Place on a wire rack to cool and then remove the bread from the pan. Serve warm or at room temperature.

Makes one - 9 inch loaf

*If you do not have or can't find Praline-Pecan sauce, you can substitute caramel sauce and add pecans.


Pecan-Praline Sauce

2 cups unsalted butter, cubed
1 1/2 cups chopped pecans
3 pounds light brown sugar
1 1/2 cups heavy whipping cream
1/2 teaspoon cinnamon
2 1/2 cups sour cream
1 1/2 teaspoons vanilla extract

Heat 1 cup of the butter in a large saucepan until melted. Add the pecans and mix well. Bring to a boil. Cook until the pecans begin to change color. Be careful! This mixture will foam over, so use a large saucepan.

Add the remaining 1 cup butter and mix well. This will cool the pecan mixture and stop the cooking process. Remove from heat.

Combine brown sugar, whipping cream and cinnamon in a saucepan and mix well. Cook over low heat until blended, stirring constantly; increase heat. Cook to 230 degrees on a candy thermometer. Stir in pecan mixture. Add sour cream and vanilla and mix well. Remove from heat.

**Just remember this makes a LOT of praline sauce - probably more like 12 cups. However, it freezes amazingly well and keeps that way for a long LONG time. :)

Sunday, July 3, 2011

Seven Layer Magic Bars

These bars are truly MAGIC!! They are a classic pot-luck and party treat that combines layers of sweet, salty, creamy goodness. They are truly simple and always a crowd-pleaser. Chocolate chips, butterscotch, and coconut are all caramelized and melt together on a crispy graham crust.


Seven Layer Magic Bars
yield: about 24 bars

No-Stick Cooking Spray
3 cups graham cracker crumbs (chocolate grahams will also work here! YUM!)
1 cup butter, melted (2 sticks)
1 (14 oz.) can Sweetened Condensed Milk
1 cup butterscotch-flavored chips
1 cup semi-sweet chocolate chips
1 1/3 cups flaked coconut
1 cup chopped nuts

HEAT oven 350°F. Spray 13 x 9-inch baking pan with no-stick cooking spray.

COMBINE graham cracker crumbs and butter; mix well. Press crumb mixture firmly into bottom of prepared pan. Pour 3/4 of the sweetened condensed milk evenly over crumb mixture.

In a bowl, mix together all other ingredients, reserving 1/3 Cup of coconut. Spread evenly over the condensed milk and press down firmly. Top with remaining sweetened condensed milk. Top with 1/3 cup of coconut and press down firmly.

Bake 25 to 30 minutes or until lightly browned. Loosen from sides of pan while still warm; cool on wire rack. Cut into bars or diamonds.

**For perfectly cut cookie bars, line entire pan with foil, extending foil over edge of pan. Coat lightly with no-stick cooking spray. After bars have baked and cooled, lift up by edges of foil to remove from pan. Cut into individual bars.

Monday, June 20, 2011

Chocolate Peanut Butter No-Bake "Cake"

This traditional "ice box cake" couldn't be easier or more surprising! As I was searching through old food magazines, I came across this recipe that peaked my interested. It's visually impressive and no one would know that the "cake" in this is really chocolate graham crackers! Truly, it looks and tastes like cake that's been expertly and painstakingly sliced to perfection.

The original recipe serves 8-10, but I very easily doubled it for a party - the only change I made was to line up the two "cakes" and frost them together.

I highly recommend making your own whipped frostings here, as it gives the cake a more special flavor. If you're looking for something that's simple and just needs to be assembled and sit in the fridge until you're ready for it - here's your recipe!


Chocolate Peanut Butter No-Bake "Cake"
serves about 8-10

2 cups heavy cream, divided
1/2 cup peanut butter chips
1/2 cup milk chocolate chips
12 whole chocolate graham crackers
optional garnish: chocolate jimmies

In a small saucepan, over low heat, combine 1/4 cup of the cream and the peanut butter chips, stirring just until melted and smooth: pour into a bowl. Repeat with the milk chocolate chips and another 1/4 cup of the cream; pour into another bowl. Refrigerate both about 15 minutes until cook, but not firm.

In a medium bowl, with mixer on high speed, beat remaining cream just until stiff. Gently fold half of the whipped cream into peanut butter mixture, 1/2 cup at a time. Fold remaining whipped cream into the chocolate mixture, 1/2 cup at a time. Refrigerate milk chocolate whipped cream.

Spread each of 10 whole chocolate graham crackers with about 2-1/2 tablespoons of the peanut butter whipped cream. Sandwich together coated crackers to form 2 stacks (5 cookies per stack). Top each stack with 1 plain graham cracker. Arrange stacks, side by side, on a serving plate, long edges touching. Frost with milk chocolate whipped cream.

Refrigerate 6 hours or overnight for cookies to soften into "cake". To serve, garnish with chocolate jimmies.

Thursday, May 26, 2011

Double Chocolate Chip Cupcakes

I came across this recipe years ago and I am still amazed at how simple, moist, and decadent this cake is. Even though it's not "from scratch" (hey, it's still homemade!) I think it's by far my favorite chocolate cake recipe.

The cake is incredibly moist and chocolatey while the extra chocolate chips add richness and even more fun! This time, I made cupcakes with the recipe, but you can also use this to make 2 9" cake rounds. It's amazing and so simple that you'd be crazy not to give it a try!


Double Chocolate Chip Cupcakes

1 box devil’s food cake mix
1 small pkg Jello instant chocolate pudding mix
1 cup sour cream
1 cup vegetable oil
4 eggs, beaten
1/2 cup milk
1 tsp vanilla
2 cups mini chocolate chips, plus more for decorating

Preheat oven to 350 degrees F. In a very large bowl, mix together everything except chocolate chips. Batter will be thick. Stir in the chocolate chips. Pour batter into cupcake tins with linters. For cooking time, I use the cooking times on the back of the devil’s food cake box as a guide and usually add 5-10 mins to whatever it says. Then I do the toothpick check, and if it’s not done, I check on it every 5 mins after that.

Allow to cool and then frost with Vanilla Buttercream frosting and sprinkle with extra mini chocolate chips.

Sunday, April 17, 2011

Cherry Berry Ice Cream

I am definitely on a homemade ice cream kick. After realizing how amazing the Strawberry Vanilla Bean ice cream was, I just couldn't wait to try another berry flavor. Since last summer, I've had an array of fruit in my freezer...cherries and blackberries from our aunt's farm in southern IL plus blueberries and peaches from Michigan. I decided that in order to jump-start the summer weather, I'd make a variation of the delicious dessert and go with a Cherry Berry Ice Cream.

For this recipe, I mixed strawberries, cherries, blueberries, and blackberries. It made the ice cream bright, fresh, and wonderfully fruity. Plus it's a really pretty pinky-purple color. I just love it!


Cherry Berry Ice Cream

1 1/2 lbs. fresh or frozen berries (I used cherries, strawberries, blackberries, and blueberries)
1 cup sugar (plus more depending on tartness)
2 tbsps. vodka (optional)
1 1/2 C. sour cream
1 1/2 C. heavy cream
1 tsp. freshly squeezed lemon juice

Directions:
Combine the berries in a medium bowl with the sugar and vodka. Stir until the sugar begins to dissolve. Cover and let stand at room temperature for 1 hour, stirring occasionally.

Transfer the mixture to the bowl of a blender or food processor and add the sour cream, heavy cream and lemon juice. Pulse briefly until almost smooth but still slightly chunky. Taste the mixture (this is essentially what your ice cream will taste like - yum! Check the sugar level. If it still seems tart, add a little more until it has the perfect amount of sweetness.)

Chill in the refrigerator for 1 hour. Freeze in an ice cream maker according to the manufacturer’s instructions.

Sunday, April 10, 2011

Vanilla Buttercream Frosting

For my son's first birthday, I made him his very own smash cake and it was so much fun to see him dig into it (hmm...I think he gets that from his Mama...) When I made the little 5" cake, I found that I had some leftover batter. I can't bring myself to throw away cake, so I made cupcakes with the leftovers. I frosted them with a simple, but delicious buttercream frosting.

This buttercream is so easy, but really tastey. I also use this recipe for cake decorating and it's never failed me. Give it a try, it's truly amazing! This recipe will yeild enough frosting to pipe about 15 cupcakes (although I'm pretty heavy-handed). If you just smeared it on with a knife, I'm sure you could get 24 cupcakes covered.


Easy Vanilla Buttercream
20 tbsp. (2 1/2 sticks) butter, softened
2 1/2 cups confectioners’ sugar, sifted
1/8 tsp. salt
2 tsp. vanilla extract
2 tbsp. heavy cream


Directions:
In a stand mixer fitted with the whisk attachment, beat butter at medium-high speed until smooth, about 20 seconds. Add confectioners’ sugar and salt; beat at medium-low speed until most of the sugar is moistened, about 45 seconds. Scrape down the bowl and beat at medium speed until mixture is fully combined, about 15 seconds. Scrape bowl, add vanilla and heavy cream, and beat at medium speed until incorporated, about 10 seconds. Then increase the speed to medium-high and beat until light and fluffy, about 4 minutes, scraping down bowl once or twice.

Source: Cooks' Illustrated

Sunday, March 27, 2011

Tuxedo Cake

This cake is perfect for a fancy party, or pretend fancy party...so get baking!

If you make all three layers (as the recipe below suggests), you will end up with a very tall cake. For a dramatic effect, it's perfect. The slices look a bit funny because they are so tall, but trust me, no one complains! I don’t think that has stopped anyone from enjoying this. You can make the same amount of batter in two 10-inch round pans for a shorter cake. I like the tall cake as it's more visually impressive.

A friend and co-worker asked for a recipe that would be perfect for a shower she was hosting. She's also an avid baker and had adjusted and increased the amounts to create a stunning cake (pictured below). The original recipe is for a tall 3 layer cake and that is the recipe below.


Tuxedo Cake
yield: 1 tall 3-layer cake

For the cake:
1 cup (2 sticks) unsalted butter
2 cups water
1 cup canola oil
4 cups sugar
1 cup unsweetened cocoa powder
4 cups all-purpose flour
4 large eggs
1 cup buttermilk
1 tbsp. baking soda
½ tsp. salt
1 tbsp. vanilla extract

For the filling:
1 lb. fresh strawberries, washed, hulled, and sliced - plus more whole berries for garnish
1/4 C. sugar
1 Tb. vodka (optional)

For the frosting:
4 cups chilled heavy whipping cream
1¼ cups confectioners’ sugar, sifted

For the chocolate topping:
4 oz. bittersweet chocolate, finely chopped
½ cup heavy whipping cream
¼ cup light corn syrup
2 tsp. vanilla extract

Directions:
To make the cake layers, preheat the oven to 350˚ F. Line three 9-inch round cake pans (or two 10-inch round cake pans) with parchment paper. Butter and flour the inside edges of the pan, shaking out the excess flour.

In a saucepan over medium heat, combine the butter, water and canola oil; heat until the butter is melted. In a large mixing bowl, combine the sugar, cocoa powder, and flour; whisk to blend. Pour the melted butter mixture into the dry ingredients and whisk until smooth. Whisk in the eggs one at a time, then whisk in the buttermilk. Add the baking soda, salt and vanilla to the bowl and whisk just until incorporated. Divide the batter evenly between the prepared pans. Bake for 35-40 minutes or until a toothpick inserted in the center comes out clean.

Let cool in the pans for 15 minutes. Run a knife around the edge of each cake layer and invert onto a wire cooling rack. Allow the cake layers to cool completely before frosting, at least 2 hours.

While the cake cools, make the strawberry filling. To make the filling, mix the strawberries, sugar, and vodka in a bowl. Let the berries macerate at least 30 minutes.

To make the frosting, add the heavy cream to the bowl of an electric mixer fitted with a whisk attachment. Whip on medium-high speed until soft peaks form. Add the powdered sugar and continue to whip until thoroughly combined and stiff peaks form. Be careful not to over-beat!

To assemble the cake, place one cake layer on a cake platter and top with some strawberries. (The berries go first...they are juicy and all of that juicy goodness will ooze into your cake and not out of the frosting.) Spread a layer of the whipped cream frosting over the top of the berries. Top with a second cake layer, more strawberries, more frosting (and the third cake layer, if using). Frost the top and sides of the assembled cake. Refrigerate until the frosting has stabilized, at least 1 hour.

To make the chocolate glaze, place the chocolate in a medium bowl. Heat the cream in a small saucepan over medium heat until simmering. Pour the hot cream over the chocolate and let sit 1-2 minutes. Whisk until the mixture is smooth. Blend in the corn syrup and vanilla. Pour the glaze into a pitcher or measuring cup and let cool for 10 minutes. (Do not let the glaze cool longer or it may become difficult to pour over the cake.) Slowly pour the glaze over the cake, ensuring that the top is covered and the glaze drips over the sides.

Refrigerate the cake until the glaze is set and the whipped cream frosting is firm, at least 1 hour. Garnish with extra strawberries. Slice with a long, sharp knife, wiping the blade clean between slices.

*Photo courtesy of H. Fitch. She truly did an amazing job! WOW!

Sunday, March 13, 2011

Double Peanut Butter Ice Cream

I tried a new flavor of ice cream and this is one of the best flavors I have made. This recipe is great because if you are like us and consider peanut butter a pantry staple, chances are you have everything you need to make it on hand. The only thing we needed to buy were the Reese’s cups. (I try not to keep these in the house because somehow they dissapear from the pantry and reappear on my hips...it's the weirdest thing...)
It seems a fact of nature that chocolate and peanut butter are a perfect pair, and this ice cream was certainly evidence of that. I think the peanut butter base would also be fantastic with a fudge ribbon through it ...mmmm....alright - let's get to eating!

Double Peanut Butter Ice Cream
¾ cup creamy peanut butter
¾ cup plus 2 tbsp. sugar
2 2/3 cups half-and-half
Pinch of coarse salt
Dash of vanilla extract
1 heaping cup mini Reese’s cups, wrappers removed, frozen and chopped

Combine all of the ingredients (minus the candy) in a blender or food processor; and puree until completely smooth. Chill the mixture thoroughly in the refrigerator. When the mixture is chilled through, freeze in an ice cream maker according to the manufacturer’s instructions. To mix in the Reese’s, transfer the ice cream to a storage container and gently fold in the peanut butter cup pieces until evenly distributed.

Adapted slightly from The Perfect Scoop by David Lebovitz

Saturday, March 5, 2011

White and Dark Hearted Brownies

I found this recipe when looking for a really tasty brownie for a friend who was in the hospital. Nothing says "Get Well Soon!" like a big plate of brownies. I came across these at Smitten Kitchen and fell in love. They are not only the cutest little brownies I have ever seen, but they had the perfect sentiment.

I was a bit hesitant about the white chocolate brownies because I'm not a huge white chocolate fan. However, these were really good....amazingly good even. Don't tell anyone, but I actually think I liked them better than the dark chocolate brownies. Maybe it was because they had a little dark chcolate heart belly, but the combination of flavors was out of this world. I also loved that they still remained very much a "brownie" to me - rich and chewy, the way a good brownie should be.
I hope you try it soon - and feel free to make the bellies whatever mini shape you have - I think these would be a very welcomed non-green treat for St. Patty's Day and little shamrocks would be irresistible!
White and Dark Hearted Brownies
**This recipe makes 16 2-inch square white or dark chocolate brownies. To make a pan of each and reverse the middles, you’ll need double the ingredients listed below. You will end up with 32 reversed-center brownies.

4 ounces (this was 1 bar for me) semisweet or good white chocolate (I used Ghirardelli for both), coarsely chopped
1 stick unsalted butter
3/4 cup plus 2 tablespoons sugar
2 large eggs
1 teaspoon vanilla
1/4 teaspoon salt
2/3 cup all-purpose flour
1-inch heart or other shaped cookie cutter

Preheat oven to 350°F. Line an 8×8-inch square baking pan with foil, with ends of foil extending over opposite sides of pan. Repeat with second piece of foil in opposite direction. Grease the foil.
Melt white or dark chocolate and butter together in a large bowl over a simmering pot of water until it is melted; remove from heat and stir the mixture until it is smooth.

Whisk in sugar. Whisk in eggs, one at a time, then vanilla. Add flour and salt together, stirring until just combined. Spread into prepared pan and bake for 25 to 30 minutes (for the dark chocolate version) and 30 to 35 minutes (for the white chocolate version).

Repeat this recipe with the other kind of chocolate and a second 8×8-inch square pan. Cool pans on a wire rack in the freezer if you’re going to make cut-outs; frozen brownies are much easier to make clean cuts from. Once solid, transfer brownies in their foil “sling” to a large cutting board and cut each pan of brownies into 16 even squares, about 2×2 inches each.

Still cold (and if they warm up and soften too quickly, pop them back in the freezer for 5 minutes), carefully, slowly, gently, press your cookie cutter into the center of each brownie and set the cut-out aside. Insert the dark cut-outs into the centers of the light brownies, and vice-versa. From here, you can let them warm up to room temperature or wrap them up in the freezer until you will need them.
adapted very slightly from Smitten Kitchen

Tuesday, January 25, 2011

Red Velvet Cake Pops


This recipe is so easy and so tasty that I had to post it as fast as I could blog about it! My great friend, Kathy, came over for a cooking visit and we had a great time making these cute little bites of deliciousness.

This was Kathy and my second attempt at making cake pops. You may have heard of them....yummy bites of cake and frosting covered in chocolate and on a lollipop? AMAZING! Please, PLEASE go visit Bakerella (www.bakerella.com) to see some truly amazing treats!

The only problems is we've never actually made them on the sticks...so they become more like bonbons, and that's ok!

You can make them using a homemade mix or a box mix (like we did). I am excited to try these using homemade recipes, but for the purpose of this post, I'll give you the quick low-down and you can experiment all you want!

Kathy's husband even renamed these treats "Devil Pops" because they're so good...consider yourself warned.


Red Velvet Cake Pops (or balls or bonbons, whatever!)

1 box of red velvet cake mix (or whatever flavor cake you'd like)
1 container of cream cheese cake frosting
1 package of chocolate candy melts
1 package of white chocolate candy melts
Sprinkles for decorating

Make the cake mix according to the box directions for a 13X9 cake pan. Allow the cake to cool completely. Over a large bowl, break the cake up into fine crumbs (Bakerella's tip is to rub pieces of cake together and it works like a charm!). To the crumbled cake, use about 3/4 (adding a little bit at at time) of the frosting and mix well. (You will NOT be using the rest of the frosting...feel free to use it for something else or discard it). The mixture should be moist enough to form into balls but not so moist that it is squishy.

*Be sure not to use too much frosting...if the cake is too moist, it will not set and it will be too squishy to coat with the candy melts. I also suspect this was our problem with getting them to stay on the sticks...I think we had the cake a bit too moist - so use a light hand with the frosting!!
Roll the mixture into balls and place on a baking sheet lined with parchment paper. Freeze the balls 15 - 20 minutes until very firm but not frozen through.

While the cake balls are setting up in the freezer, melt the candy melts in batches in microwave safe bowls. We used both white and dark chocolate candy melts for our cake balls. In a microwave safe bowl, melt at 50% power in 30 second increments.

Once the cake balls are set, plop one ball into the candy coating of your choice. With a spoon, make sure the ball is completely coated. Using the spoon, scoop out the cake ball and tap lightly to let any excess drip back into the bowl and get a nice, smooth finish on your cake ball.

Allow the cake ball to slide off the spoon back onto the parchment paper. Decorate immediately with the sprinkles of your choice (candy melts harden really quickly, so make sure if you're using sprinkles, to do it now!). Repeat with the remaining cake balls.

Try to resist, I dare you!

Saturday, January 22, 2011

French Macarons

I AM NOT AFRAID OF YOU!

This was my mantra when attempting to make French Macarons for the first time. Everywhere in the blogging world I was seeing these beauties. But just as frequently, I was reading posts about how difficult, finicky, and troublesome these treats were. So....I was afraid....just a little.


My brother and sister-in-law were coming over for a special dinner and I really wanted to surprise them with macarons. They'd first had them in France and then found some at Trader Joe's....and they were also amazing. But, being as daring (foolish?) as I was, I was determined to make them from scratch....please pray for me.


As it turns out, they are truly not that difficult. If you read up, do your homework, and have a plan things will go just fine. Once you're comfortable with the process, the possibilities are truly endless. Exciting new color and flavor combinations abound on the internet. So read this post, read some other posts, and decide if you're ready to make some of the most rewarding treats of your life!


Good luck!


*You will find the the measurements for the macaron shells are in metric, not volume. A kitchen scale is a MUST for these, therefore, other measurements will not be given.


Chocolate Macarons with Espresso Ganache Filling

For the Macarons:
110 gm blanched slivered almonds
200 gm minus 2 tbsp. confectioners’ sugar
2 tbsp. cocoa powder (Dutch-process preferred)
100 gm egg whites (from about 3 eggs), aged at room temperature for 12-24 hours
50 gm granulated sugar


For the espresso ganache:
½ cup heavy cream
1 tbsp. unsalted butter
1 tbsp. granulated sugar
4 tbsp. bittersweet chocolate, finely chopped
1½ tsp. espresso powder

To make the macaron shells: Pulse the almonds until finely ground in the bowl of a food processor. Add the confectioners' sugar and cocoa powder until blended.

In the bowl of a stand mixer fitted with the whisk attachment, whisk the egg whites on medium-high speed until foamy. Gradually add the granulated sugar and continue beating until a smooth, shiny meringue (with stiff peaks) forms.

Add the ground almond mixture to the bowl with the meringues and gently fold together using a rubber spatula until all streaks are gone.

Line two baking sheets with silicon mats or parchment paper. Transfer the batter to a piping bag fitted with a plain, wide round tip. Pipe into small rounds (1-1 1/2 inches) spaced about 1 inch apart. Let them sit at room temperature for 30 - 60 minutes or until a hard shell forms.


Preheat the oven to 300 degrees. Bake 10 - 12 minutes (do not underbake! They will stick to the pan and "disembowel" themselves - although these still taste just as yummy!). Transfer the pan to a cooling rack and allow the shells to cool completely before moving the cookies.


While the cookies are cooling, make the ganache. Combine the cream, butter, and sugar in a small saucepan over medium-high heat. Place the chocolate in a small heat-proof bowl. Bring the cream mixture to a simmer, remove from the heat and pour over the chocolate. Let stand 2 minutes, then whisk gently in a circular motion until the ganache forms. Blend in the espresso powder (if using). Let the mixture cool until it is thick enough to pipe. (To speed the chilling process, place the bowl in the freezer and let cool, stirring every 15 minutes, until thick.)

Once the cookies have totally cooled, match them up by size. Pipe a layer of ganche on one cookie and sandwich it with another. Store in an airtight container.


Vanilla Bean Macarons with Swiss Buttercream Filling

Yield: about 20 macarons

For the macaron shells:
200 grams confectioners’ sugar
110 grams almonds (blanched, slivered, or sliced)
90 grams egg whites (aged at room temperature for 1 day or 3-5 days in the fridge)
25 grams granulated sugar
1 vanilla bean, split lengthwise with the seeds removed

For the filling:
½ cup sugar
2 large egg whites
12 tbsp. unsalted butter, at room temperature
½ tsp. vanilla extract

To make the macaron shells, combine the confectioners’ sugar and almonds in a food processor. Pulse until the almonds are finely ground and the mixture is well blended. In the bowl of a mixer fitted with the whisk attachment, beat the egg whites on medium speed until foamy. Increase the speed to medium-high and continue to beat, gradually adding the granulated sugar. Beat until a stiff, glossy meringue forms (do not over-beat). Add the ground nut mixture to the bowl with the egg whites. Add the vanilla beans. Fold together with a spatula until all of the dry ingredients are incorporated and the batter is thick and smooth.

Line baking sheets with silicone baking mats or parchment paper. Fit a pastry bag with a plain round tip and pipe small rounds onto the prepared baking sheets, about 1½ inches in diameter. Let the piped rounds sit at room temperature for 30-60 minutes to harden their shells.

Preheat the oven to 280˚ F. Bake for 15-20 minutes. Let cool 15-20 minutes before removing from the baking sheet. Let cool completely before filling or storing.

To make the frosting, combine the sugar and egg whites in a heatproof bowl set over simmering water. Heat, whisking frequently, until the mixture is hot to the touch and the sugar is completely dissolved. Transfer to the bowl of a stand mixer fitted with the whisk attachment. Beat on medium speed until a thick and shiny meringue has formed and the bowl is cool to the touch. Reduce the mixer speed to medium-low. Add in the butter 1 tablespoon at a time, waiting until each is incorporated before adding more. Once all the butter is incorporated, increase the speed to medium-high and beat until thick and smooth. Blend in the vanilla.

To assemble the macarons, pair up the shells by size. Add the finished frosting to a pastry bag fitted with a plain round tip. Pipe a small round of frosting onto the flat side of one shell from each pair. Sandwich together with the other shell and push gently together so that the frosting reaches the edges of the cookies. Place the crushed candy canes in a shallow dish. Gently roll the assembled macarons in the crushed candy canes so they adhere to the frosting.

Tuesday, January 18, 2011

Double Chocolate Chip Cookies

These cookies have been making their rounds in the blogging world...so I just had to see what all the fuss was about! Turns out, these cookies are really decadent, full of rich chocolate flavor, and HEAVENLY when eating warm with a tall glass of cold milk!

The recipe is one that claims to be a replica of the famous Giant Double Chocolate Cookies from Lavain Bakery in Manhattan. This bakery is known for their decadent and over-the-top cookie creations. I have never been to Manhattan, so I've never had these cookies, but they seemed pretty irresistible to me.

Rather than make 12 enormous cookies as the original recipe stated, I decided to make smaller cookies. That way, when I eat them, they are tiny and therefore have less calories....right?

Another tip - try these still warm out of the oven. That's when they are the best! But, if you wait a bit, try reheating them for 10-12 seconds in the microwave the make them gooey and melty all over again! They will be good as new!

Double Chocolate Chip Cookies

1 cup (2 sticks) cold, unsalted butter, cubed
1¼ cup sugar
2 large eggs
½ cup dark cocoa powder
2¼ cups all-purpose flour
¼ tsp. coarse salt
1 tsp. baking powder
2½ cups semi-sweet chocolate chips

Preheat the oven to 350˚ F. Line baking sheets with parchment paper or silicone baking mats. In the bowl of an electric mixer, combine the butter and sugar. Beat together on medium-high speed until light and fluffy, 2-3 minutes. Blend in the eggs one at a time, scraping down the bowl as needed. Mix in the cocoa powder until well blended. Add the flour, salt and baking powder to the bowl and mix on low speed just until incorporated. Fold in the chocolate chips with a spatula. Transfer the dough to a work surface and knead briefly by hand to be sure the ingredients are well combined.

Using a cookie scoop or tablespoon, divide into equal portions (OR divide into 12 equal pieces for those giant cookies!). As you work, roll each portion of dough into a ball and flatten just slightly into a disc. Place on the prepared baking sheets, a few inches apart. Bake 16-20 minutes or until the centers are just set - do not overbake!. Let the cookies cool on the baking sheets 5-10 minutes, then transfer to a wire rack to cool completely.

Sunday, January 9, 2011

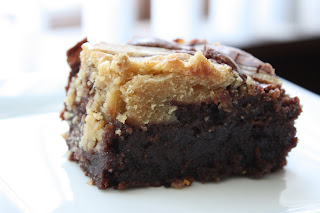
Peanut Butter Cream Cheese Brownies

For all your New Year's dieters, beware! I came across a similar recipe and immediately made it for my husband (well, it was for me too, but I said it was a special treat for him...I'm a good wife that way.). It's deliciously sinful and decadent....peanut butter....cream cheese....BROWNIES!! These are truly mouthwatering and go great with a tall glass of cold milk. Hey...that's getting your calcium, right?

This was the first time that I'd ever made my own brownies rather than using the box (they are just so darn convenient!) but I am glad I did. Adding the cream cheese to the brownies AND to the topping really made this rich, creamy, and worth the 9 billion calories :) (Can you tell I am anti-diet resolutions??)

Ok, these really aren't THAT bad for you...go on, try them...you know you want to!

Peanut Butter Cream Cheese Brownies

Brownies:
14 T. butter
6 oz. semi-sweet chocolate chips
1 C. dark chocolate cocoa powder
2 C. sugar
6 oz. cream cheese, softened
6 eggs
2 tsp. vanilla extract
1 tsp. salt
1 C. flour


Peanut Butter Cream Cheese swirl:
8 oz. cream cheese, softened
2/3 C. creamy peanut butter
6 T. sugar
1 egg
1 tsp. vanilla extract

Preheat the oven to 350 degrees. Line a 13X9 pan with foil or parchment paper and spray lightly with nonstick spray.

To make the brownie batter, melt together the butter and chocolate in a large bowl. Whisk in the cocoa powder, sugar, eggs, and cream cheese until smooth. Mix in the vanilla and salt. Add the flour and whisk until just incorporated. Pour the batter into the prepared dish.


To make the peanut butter swirl, combine the cream cheese, peanut butter and sugar with an electric mixer at medium speed until smooth. Blend in the egg and vanilla.

Drop spoonfuls of the peanut butter mixture over the brownie batter, creating a cobblestone appearance. Use a knife of skewer to gently swirl the peanut butter mixture and brownie batter.


Bake 30-35 minutes or until the center is just set. Let cool at room temperature. Cover and chill in the refrigerator until ready to slice and serve. Enjoy!

Saturday, January 1, 2011

Buckeyes

When I first saw these peanut butter beauties, I knew I had to make them for my husband. You see, on one of our first dates, he found a buckeye and told me that his grandpa used to carry a buckeye in his pocket for good luck. He gave it to me and told me to keep it. He said that he didn't need any more good luck because he already had me. Altogether now, "AWWW!" He's so sweet like that. I knew even then that he was a keeper.

These treats turned out perfectly and were a real hit over the holidays. To me, they taste a lot like Reese's Peanut Butter Cups and are dangerously addictive. They were also really simple to make but were impressive enough to bring to a party.

I hope you give these a try and if you're ever lucky enough to find a real buckeye, pick it up and hang on to it. Mine's been pretty lucky for me so far. :D


Buckeyes

1/4 cup cream cheese, softened
1 1/2 cups creamy peanut butter
1 cup graham cracker crumbs (from about 10-12 graham crackers)
1/2 tsp. salt
3 cups confectioners’ (powdered) sugar
10 Tbs. butter, melted and cooled
12 ounces dark chocolate, coarsely chopped

In the bowl of an electric mixer, beat the cream cheese and peanut butter together until combined. Add the graham cracker crumbs and beat for 10 seconds. Add the sugar and butter, and mix on the lowest speed until combined, then increase the speed until the ingredients are well mixed (remember to scrape down the bowl to make sure everything is incorporated). The mixture will be crumbly and a little dry — this is perfect for shaping. Set it aside while you prepare the coating.

Melt the chocolate either over a double boiler, stirring until it is completely smooth or in a microwave in 30 then 10 second increments, stirring before you start it again until it is completely smooth. Let it cool to tepid while you shape the peanut butter centers.

Line a sheet pan with parchment paper. Scoop out slightly more than one tablespoon’s worth of filling, break in half and use your hands to form it into two balls. Place the peanut butter centers on the prepared sheet and repeat the process until all of the candies have been shaped. They can sit close to each other but make sure they are not touching.

Using a fork or large skewer, dip each ball into the chocolate and roll it about so that almost the entire candy is coating, leaving a small circle uncoated. I found it easiest to stick the skewer in the side, angle the bowl I was using towards it and make sure it became submerged as I rolled the candy around.

Chill the buckeyes until they are set, about 30 minutes.

Recipe adapted slightly from Smitten Kitchen