Showing posts with label appetizer. Show all posts

Monday, January 9, 2012

Gruyere Popovers

While watching Food Network's "The Best Thing I Ever Ate: Appetizers" I saw this gem. Tyler Florence said that these popovers from BLT Steak in NY where his personal favorite - and what a coincidence! I got a popover pan for Christmas!!

Ok, so it wasn't exactly a coincidence...I saw the episode, bought a popover pan, gave it to my husband and told him I'd act surprised on Christmas when I unwrapped it...yes, I made him wrap it. :) Truly though, you don't really need a popover pan. You could use a muffin tin, but you'd have more (and smaller) popovers - which might be nice for a party!

This recipe is so simple and very scrumptious. They are light and fluffy with a crispy, cheese top and a slight layer of gooey cheese in the middle. YUM!


Gruyere Popovers


4 C. milk, warmed
8 eggs
4 C. flour
1/2 heaping Tbs. salt
2 1/4 C. grated Gruyere

Place the popover pan in the oven. Heat the oven and pan to 350 degrees.

Gently warm the milk over low heat and set aside. Whisk the eggs until frothy and slowly whisk in the milk. Set the mixture aside.

Sift the flour and the salt together. Slowly add this dry mixture to the egg mixture and gently combine until mostly smooth.

Remove the popover pan from the oven and spray with non-stick spray.

While the batter is still slightly warm, fill each popover cup 3/4 full. Top with approximately 2 1/2 Tbs. of the grated cheese.

Bake at 350 degrees for 50 minutes or until the popovers are high and golden brown on the sides.

Take out of the oven, remove from pan and serve warm.

*Recipe from BLT Steak House via Food Network

Sunday, April 10, 2011

Mac and Cheese Cups

I first saw these at a 1st birthday party for one of Mr. Man's friends. They were so adorable and I loved the concept of a mess-free (well, sort of) mac and cheese. I decided to steal the idea and make them for Mr. Man's 1st birthday party.

The only change I made to the original recipe was to add a little garlic salt and pepper. I thought the mac and cheese plain needed a little more pizazz. The recipe states "to taste" which for me, came to about 1/2 tsp. or so of each.

They were great for the kids but the adults also loved them. I am not admitting to how many I consumed during the party...that would be too embarrassing.


Mac and Cheese Cups
yield: about 12 cups

2 cups uncooked elbow macaroni
1 tablespoon butter
1 egg, beaten
1 cup milk
1 1/2 cups shredded sharp Cheddar cheese
1 1/2 cups shredded mozzarella cheese
garlic salt and pepper, to taste.
1/2 cup seasoned dry bread crumbs
2 teaspoons olive oil
1/2 teaspoon salt

Preheat the oven to 350 degrees F. Grease a muffin tin with nonstick cooking spray. In a small bowl, stir together the bread crumbs, olive oil and salt; set aside.

Bring a large pot of lightly salted water to a boil. Add the macaroni and cook for about 8 minutes, it should still be a little bit firm. Remove from the heat, drain and return to the pan; stir in the butter and egg until pasta is evenly coated. Reserve 1/2 cup of sharp Cheddar cheese and stir the remaining Cheddar cheese, milk, garlic salt, pepper, and mozzarella cheese into the pasta. Spoon into the prepared muffin tin. Sprinkle the reserved cheese and the bread crumb mixture over the tops.

Bake for 30 minutes in the preheated oven, or until the topping is nicely browned. Allow the muffins to cool for a few minutes before removing from the pan. This will allow the cheese to set and they will hold their muffin shape.

Wednesday, January 19, 2011

Baked Brie en croute with Fig Jam

If you're looking to impress with an effortless appetizer, you've found your recipe. This is a recipe which has Brie (a mild, creamy cheese) paired with fig jam and baked in a puff pastry crust (hence the very French, "en croute" which means "in a crust"). Pretty straightforward, right? It's also really fun to use the leftover puff pastry to decorate the top - it really adds that "little something extra!"

This appetizer is not only delicious, but fast and a real crowd pleaser. When you cut through the flaky crust, you are left with the sweet fig jam and a gooey, cheesy center. Spread it on water crackers and you'll be in Brie Heaven!


Baked Brie en croute with Fig Jam

1 sheet puff pastry, rolled to ¼-inch thickness
1 round Brie cheese, 6-8 oz. and about 4½ inches wide, chilled
1 egg beaten with 1 tbsp. water
1 small jar of prepared fig jam
Water crackers, for serving

Preheat the oven to 375˚ F. Line a baking sheet with parchment paper or a silicone baking mat. Transfer the puff pastry to the prepared baking pan. Spoon a small amount (2-3 Tbs.) of the fig jam in the center of the puff pastry.

Using a sharp knife, cut the disc of cheese in half horizontally to create two thinner discs. Place the bottom disc in the center of the jam. Spread another 3-4 Tbs. of fig jam over the surface of the cheese. Top with the remaining cheese disc. Bring the puff pastry up around the edges of the brie. Fold and pinch the edges so that it is sealed at the bottom. Trim any excess puff pastry and save for decorations.

Flip the puff pastry over so that the seam is on the bottom. Using a knife or cookie cutters, cut out decorative shapes for the top of the brie. Adhere to the puff pastry with a small amount of the egg wash. Brush the surface of the puff pastry lightly with the egg wash.

Here it is all prettied-up and ready to get the egg wash!

Bake until the puff pastry is golden all over and crisp, 40-45 minutes. Let rest 5 minutes, then transfer to a serving platter with a knife and crackers.

Saturday, November 6, 2010

Jalapeno Popper Dip

For a Halloween party, I decided to bring a really easy appetizer. That way, I could enjoy the party without having to worry too much about what I brought. This dip turned out to be really popular at the party and it's amazing how simple it is. Just mix everything a bowl, sprinkle the bread crumb topping, and bake.

The dip would also be a really great addition to any Sunday Football party or another crowded get-together. I served it with slices baguette (my favorite) and also a carrot, snap pea, and broccoli medley to give it some color and make me feel slightly less guilty about all the creamy goodness!

Oh, and please forgive the photo. I'm not kidding when I say that people plowed into this so fast that it was hard to get a good picture. I even heard that whatever was leftover after I'd left was eaten by the spoonful by a few of the guys! Plus, I was ready to get partying, so you'll have to trust me on this one. It not only tastes amazing, but looks really pretty in person too. Oh, and you can always check out Annie's Eats (where I got the recipe) for a beautiful picture of the dip.


Jalapeno Popper Dip
2 (8 oz.) packages cream cheese, softened
1 cup mayo
1 (4 oz.) can chopped mild green chiles
1 (4 oz.) can diced hot jalapeƱo peppers
1/2 cup shredded Mexican style cheese
1/2 cup shredded mozzarella cheese
1 cup Panko breadcrumbs
1/2 cup grated Parmesan cheese
Cooking spray

Preheat the oven to 375˚ F. In a medium bowl, combine the cream cheese, mayonnaise, green chiles, jalapeƱos, and shredded cheeses. Mix thoroughly with a spoon or spatula until smooth and evenly combined. Spread the mixture into a baking dish (approximately 9 x 9-inches).

In a second bowl, combine the Panko and Parmesan and stir with a fork until combined. Sprinkle over the cream cheese mixture in the baking dish. Spray lightly with cooking spray. Bake for 25-30 minutes or until the mixture is hot and the topping is golden. Serve warm with baguette slices, vegetables, etc. as desired.

Saturday, September 25, 2010

Peach Preserves

Not that I needed an excuse to use up some summer peaches I have, but I did find an AMAZING way to make the distinct taste of summer last all winter. My uncle made these peach preserves and this recipe is so good. We (ok, mostly I...) plowed through his batch and just had to make a batch of our own. It's as fresh tasting as it is addicting. I just spread it on crackers and eat it, but you can also use this recipe as a glaze over chicken or pork. So simple, very impressive, and defintely worth the canning effort!


Peach Preserves
(thanks to my uncle for the fool-proof recipe!)

3 lbs peaches, "cling free" ( they are much easier to work with like Red Haven)
1/4 cup of lemon juice
7 1/2 cups of sugar
1 pouch of liquid pectin - 3 oz.

Boil a pot of water and drop peaches in for about 1 minutes. This will soften the skin and it should come right off. Remove the pit and discard. Finely chop skinned and pitted fruit. You should get about 4 cups of fruit.

Wash canning jars in your dishwasher on hottest setting and leave them in there until ready to use. Put lids into just simmering water on stove and let them stay. Put bands into a bowl and pour boiling water over them just until covered. Bring your boiling water canner, half full of water, to a simmer.

In a 6-8 quart heavy saucepan, mix exact measure of fruit, stir in lemon juice and sugar. Bring mixture to a roiling boil. Add pectin and bring back to a roiling boil for exactly 1 minute, stirring constantly. Remove from heat and skim off foam with a metal spoon.

Ladle hot jam into prepared jars to within 1/8 of top. Place lid on and secure with band tightly, but not too tight. You should get about 8 - 8 oz jars.

Put jars on a rack in boiling water canner and bring to a gentle boil. Jar should be covered by 1-2 inches of water. Process for 10 minutes.
Remove jars and place upright on a towel to completely cool. After jars are cool, check seals by pressing middle of lid with finger. If lid springs back it is not sealed and should be refrigerated.
Let stand at room temperature to help with the setting process. This can take awhile, so be patient. Store in a cool, dry place for up to a year.

Sunday, September 19, 2010

Smoked Mozzarella and Chicken Frittata

I have to apologize for this recipe. You see, I have had it a long time and have been holding out on you! I saw a frittata recipe a long time ago and though "Hey, that look like quiche...I like quiche - let's do this!" But then a came across/ thought up recipes for other treats like gooey pasta bakes with Italian sausage and apple cake with homemade caramel sauce (all coming your way soon) so this one got thrown to the back burner.

But, when I made it recently, I realized the error of my ways. This recipe was really good and worthy of it's very own post. What I like here is the method...frittata are fun, easy, and always impressive (and cute!) when in mini form. I actually prefer this method in the muffin tin because they are more manageable. You don't have to worry as much about the edges being rubbery and the center still liquid. They bake nice and evenly. Plus, you can be free to add/ substitute other ingredients. I have also made Bacon-Cheddar Frittatas with this very same recipe - I just subbed out the chicken and mozzarella and added in the bacon-cheddar duo (Which, by the way, my husband loved just a bit more than these...in the end I liked the chicken-mozzarella version best and it's my blog so here you go :) But don't worry, he wasn't too heart broken).


Mini Smoked Mozzarella and Roast Chicken Frittata

1/2 pound orzo pasta
7 large eggs
1/2 cup milk
1/4 cup cream
1/2 cup mascarpone cheese
6 ounces diced roast chicken breast
5 ounces smoked mozzarella cheese, diced
1/2 cup grated Asiago cheese
1/4 cup finely chopped fresh flat-leaf parsley
2 garlic cloves, minced
1/2 onion, diced
1 teaspoon salt
3/4 teaspoon freshly ground black pepper
1/8 teaspoon freshly grated nutmeg
Special equipment: 1 regular-sized muffin tin for 12 muffins

Bring a large pot of salted water to a boil over high heat. Add the pasta and cook until tender but still firm to the bite, stirring occasionally, about 8 to 10 minutes. Drain the pasta in a colander.

Preheat the oven to 375 degrees F. Grease the muffin tin.
In a blender combine the eggs, milk, cream, and mascarpone cheese. Blend until well combined. Transfer the mixture to a large bowl. Add pasta, chicken, mozzarella cheese, Asiago cheese, parsley, garlic, salt, pepper, and nutmeg. Stir until the ingredients are combined.

Using a 1/3 cup measure, fill each of the muffin tins until both the pasta and liquid are just below the top. Bake until just firm and cooked through, about 30 to 35 minutes. Let cool for 3 minutes before removing from the tin. Arrange on a serving platter and serve.

Thursday, August 19, 2010

Garlic Lime Chicken Quesadillas

I was thinking about the last time I made quesadillas and how amazing they turned out! The problem is, I really try to stretch myself as a cook and don’t repeat recipes too often unless I get a craving or a special request from my husband! So, I decided to put a new twist on my quesadillas.

I came up with Garlic Lime Chicken Quesadillas because I love the combination of flavors and they were all things I had on hand tonight! I always see Garlic Lime entrees at restaurants and they are always yummy. So, I wanted to try to recreate those same flavors in a quesadilla because I think everything is better with cheese!

A lot of what I put into my quesadillas can be adjusted based on your tastes or what you happen to have in your pantry. I hope you like these quesadillas as much as we did!


Garlic Lime Chicken Quesadillas

spice mix:
1 tsp. minced garlic
1 tsp. minced onion
3/4 tsp ground cumin
3/4 tsp. oregano
1/2 tsp. cilantro
1/2 tsp. crushed red pepper, optional
1/2 tsp. pepper
1/2 tsp. salt

1/4 C. lime juice
1/4 C. orange juice
3 chicken breasts, cubed
1 medium bell pepper
1/2 medium onion
1 c. corn
1 sm. can mild green chiles
1 1/2 to 2 C. Mexican blend cheese (I like my quesadillas very gooey and cheesy so I used 2 cups)
6 flour tortillas

In a small bowl, mix lime juice, orange juice, and the spice mix. Reserve 1/4 cup of the marinade. Place the pieces of chicken in a large Ziplock bag or shallow dish. Add the remaining marinade and turn to coat well. Allow the chicken to marinate at least 30 minutes.

Heat a skillet to medium-high heat. Remove the chicken from the marinade and cook until browned and cooked all the way through, about 4 minutes. Remove from skillet and place in a medium sized bowl. Add the onion, bell pepper, chiles, corn, and remaining marinade. Cook until the onions are tender and most of the liquid has been evaporated, about 5 minutes. Add to the chicken mixture. Add the cheese and mix well.

Using a paper towel, wipe the skillet (You will be using it to sear the outside of the quesadillas so it doesn’t have to be cleaned, just most of the moisture removed). Heat the skillet to medium-high heat.

Evenly distribute the mixture on one side of the 6 quesadillas (about 1/2 cup of filling), fold in half. Place quesadillas, one at a time, in the skillet to brown the quesadillas and melt the cheesem flipping once.

Cut each quesadilla into 3 triangles and enjoy!

Wednesday, August 11, 2010

Homemade Soft Pretzels with Sweet Mustard Dipping Sauce

A few weeks ago I went to Weber Grill for a baby shower and they had the most amazing pretzel bread. My love affair with pretzel bread started a loooong time ago, but it was just recently that I have felt brave enough to try bread. You see, I have a long history of lost bread battles.

I once had a recipe for dinner rolls but they turned out more like hockey pucks. Not so yummy...For whatever reason, homemade bread has not been my friend. But, after much thought, amazing reviews online, and one too many delicious pretzel rolls, I decided to try out Alton Brown's recipe for homemade soft pretzels.

This recipe is SO worth it! Actually, it's pretty easy too. There are a few weird (to me, the novice breadmaker) steps, so I tried to photograph many of the steps to share with you. I hope they help! Like I said before, this recipe is far simpler than it seems at first and is a great way to begin making bread.

I also decided to forgo using all of the dough for traditional looking pretzels. Plus, I got bored with rolling and twisting. So, half of the dough was used to make pretzels and the other half was used to make rolls.

These are so perfect that I will definitely be making them again. Next time, though, I think that I am going to top them with cinnamon and sugar instead of the finishing salt - YUM!


Homemade Soft Pretzels

1 1/2 cups warm (110 to 115 degrees F) water
1 tablespoon sugar
2 teaspoons kosher salt
1 package active dry yeast
22 ounces all-purpose flour, approximately 4 1/2 cups
1/2 stick unsalted butter, melted
Vegetable oil, for pan
10 cups water
2/3 cup baking soda
1 large egg yolk beaten with 1 tablespoon water
Pretzel salt (I just used Kosher salt from my salt grinder and it was perfect!)

Combine the water, sugar and kosher salt in the bowl of a stand mixer and sprinkle the yeast on top.


Allow to sit for 5 minutes or until the mixture begins to foam.


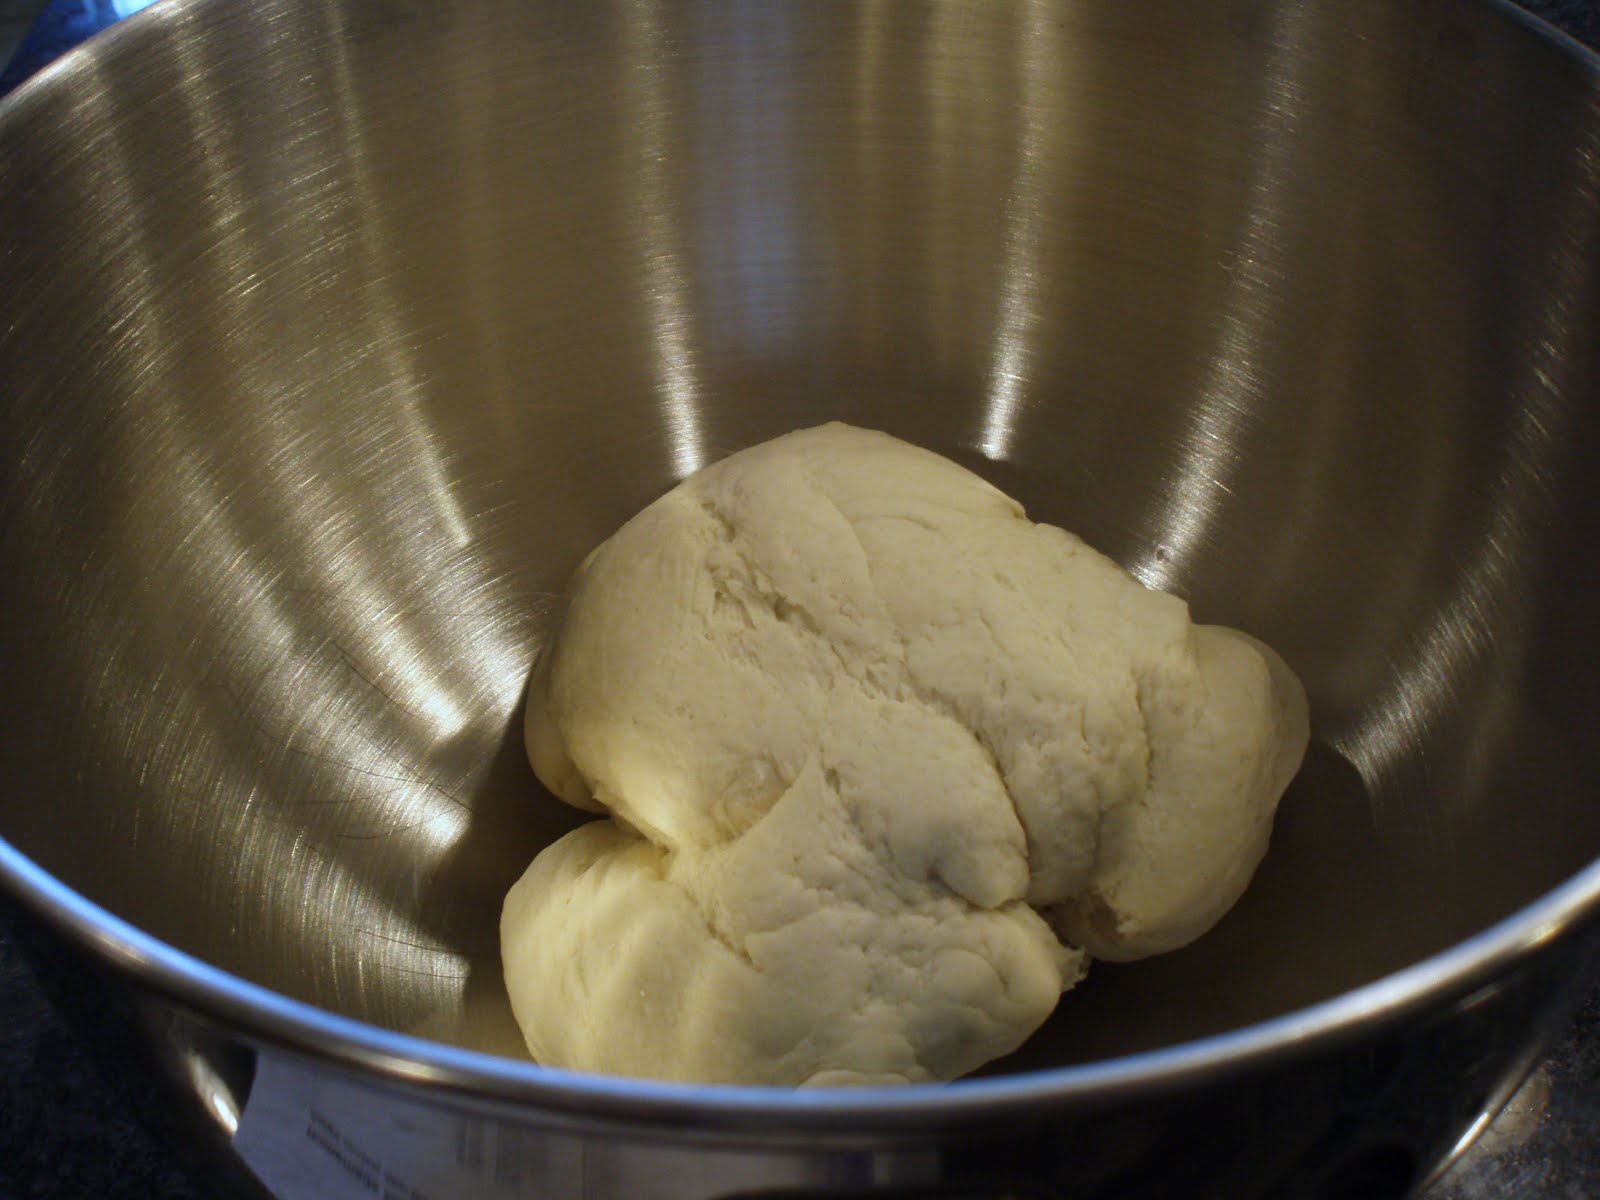
Add the flour and butter and, using the dough hook attachment, mix on low speed until well combined. Change to medium speed and knead until the dough is smooth and pulls away from the side of the bowl, approximately 4 to 5 minutes.


Remove the dough from the bowl, clean the bowl and then oil it well with vegetable oil. Return the dough to the bowl, cover with plastic wrap and sit in a warm place (I used the warming drawer on my oven set on LOW) for approximately 50 to 55 minutes or until the dough has doubled in size.


Preheat the oven to 450 degrees F. Line 2 half-sheet pans with parchment paper and lightly brush with the vegetable oil. Set aside.

Bring the 10 cups of water and the baking soda to a rolling boil in an 8-quart saucepan or roasting pan.

In the meantime, turn the dough out onto a slightly oiled work surface and divide into 8 equal pieces. Roll out each piece of dough into a 24-inch rope. Make a U-shape with the rope, holding the ends of the rope, cross them over each other and press onto the bottom of the U in order to form the shape of a pretzel. Place onto the parchment-lined half sheet pan. *(This is where you can either make pretzel shapes or rolls...your choice!)


Place the pretzels into the boiling water, one at a time, for 30 seconds.


Remove them from the water using a large flat spatula. Return to the half sheet pan, brush the top of each pretzel with the beaten egg yolk and water mixture and sprinkle with the pretzel salt.


Bake until dark golden brown in color, approximately 12 to 14 minutes. Transfer to a cooling rack for at least 5 minutes before serving


Sweet Mustard Dipping Sauce

1/2 C. Dijon Mustard
1/4 C. Maple Syrup
1 T. Brown Sugar

In a small bowl, whisk all ingredients together until smooth. Enjoy with Homemade Soft Pretzels!

Wednesday, August 4, 2010

Pizza Bites

This is yet another recipe from my summer party - we had quite the spread! These pizza bites are fun and super easy. They are great make-ahead snacks too. I assembled them and then put them in the freezer until I was ready to bake and serve! There aren't any real measurements in this recipe because the pizza bites are really filled with whatever you want - so go crazy!!

The pizza bites are also really kid friendly. What kid doesn't like pizza?! But, if you are looking for something a little more "adult" and elegant, play with the toppings/fillings that you put inside. The biggest hit at the party was the italian sausage and tomato - this combo is definitely a winner. But, whatever toppings you like, go for it, I promise it will be good!


Pizza Bites
1 roll refrigerated pizza dough
pizza sauce for dipping
2 T grated Parmesan cheese
1 T olive oil
1/2 t garlic powder
1 t dried Italian seasoning
mozzerella cheese
Pizza toppings of your choice: ham and pineapple, pepperoni slices, italian sausage, tomato, etc.


Preheat oven to 400 degrees.

Unroll your pizza dough onto a lightly floured surface. Pat or roll the dough so it's about 12" by 8". Use a pizza cutter to divide the dough into 24 squares.

Place cheese and desired toppings on each square. (*Remember NOT to add any pizza sauce here...it's for dipping afterward and will ooze out everywhere if you add it here! Trust me, I tried it.) You can add as much filling as your want, I added about a teaspoon each of cheese and pepperoni and then cheese, italian sausage, and tomatoes for the others.

When all of your dough squares have cheese and toppings on them, carefully lift up each square and wrap the dough around the toppings. Pinch to make sure each ball is sealed shut and then place them seam side down in a lightly sprayed pie pan. They will be tightly packed.

Brush the tops of the dough balls with olive oil and then sprinkle with the garlic and Italian seasoning and top with Parmesan cheese.

*If freezing, wrap tightly with plastic wrap and freeze until needed. These are great because they can be cooked from frozen whenever you want a pizza snack!

Bake for about 15-20 minutes or until golden brown on top (this time will be longer if frozen). Serve warm with warmed marinara sauce on the side for dipping.

Adapted from Our Best Bites

Tuesday, August 3, 2010

Ham and Cheese Sliders

When figuring out recipes for our latest summer party, I wanted something that would be delicious, fun, but simple for me to throw together. I don't know about you, but I think food is so much more fun and cute when it's smaller! These Ham and Cheese Sliders were perfect because they are so easy to put together and everyone loved them. I had to hide a few in the fridge to make sure I got one at the end of the night. And on that note, these are amazing as late-night snack food!

You might not think that Ham and Cheese sandwiches are very special, but the sauce that you drizzle over these babies is amazing. It really takes this recipe from plain ham and cheese sammie to irresistible party food. Plus, the sweetness of the Hawaiian rolls cute the tang of the mustard to strike a really nice balance. If you don't have poppyseeds or don't want to spring the extra cash for them, don't worry. They are just to make the sandwiches a little more pretty and fun...besides, if you leave them off you won't have to worry about poppyseeds in your teeth!

Needless to say, everyone kept coming back for more and I hope you give these Ham and Cheese Sliders a try!


Ham and Cheese Sliders

For the sandwiches:
24 mini Hawaiian rolls
24 slices honey ham
24 small slices Swiss cheese
Miracle Whip (or mayo if you're one of THOSE people - hehe)

For the topping:
2 tbsp. yellow mustard
8 tbsp. butter, melted
1 tbsp. finely minced onion
1/2 tsp. Worcestershire sauce
Poppy seeds, for sprinkling

Directions:
Preheat the oven to 350˚ F. Split the rolls and spread both sides lightly with Miracle Whip. Fold a slice of ham to fit on each slider bun, and top with a slice of Swiss cheese. Replace the top bun to assemble the sandwiches. Place the sandwiches on a baking sheet, very close together (See picture below).


To make the sauce, combine all ingredients except the poppy seeds in a small bowl and whisk to combine. Drizzle the sauce over the tops of the slider buns. Sprinkle with poppy seeds. Cover with foil and bake 10 minutes, until the cheese is melted. Remove the foil and bake 2 minutes longer. Serve warm.

Adapted from The Girl Who Ate Everything

Thursday, July 29, 2010

Hawaiian Island Dip

This recipe is an old family favorite. My mom and aunt have been making it for a long time, but only recently did I decide to give it a try at my latest party. When you look at the ingredients, it seems an odd combination. Honestly, when my mom told me the ingredients, I thought she was joking...pineapple, green onion, and green pepper? Eh....I'm not sure sure...

Boy was I wrong!! This dip is as good as I remember. Sweet, slightly spicy, and completely addicting. I had to store it in the fridge so I didn't eat it all before our guests came!

Oh, and my mom swears that it's even better if you use Pepperidge Farm butterfly shaped crackers...she claims they are not only "prettier for company" but they are sturdier and hold up better...so if you can find them (I couldn't...) then get those to go with this super easy, crazy delicious dip.


Hawaiian Island Dip

2 packages cream cheese, at room temperature
1 large can crushed pineapple, drained very well
3 green onions, finely chopped
1/2 green pepper, finely chopped
1/2 tsp. seasoned salt
1/4 to 1/2 tsp. crushed red pepper flakes

In a medium bowl, combine all ingredients. Mix until well blended. Store in the refrigerator, at least 1 hour (it's best overnight or even 1 day ahead). Serve with crackers.

Wednesday, July 28, 2010

Grilled Basil Shrimp

Another great way to fill up but not fill out during summer is to cook and enjoy shrimp. Shrimp is so versatile because it absorbs the flavors around it. This makes it perfect for a rich and delicious marinade.

This grilled basil shrimp combines the freshness of lemon and basil with the savory flavors of garlic and spicy brown mustard. These shrimp are the perfect topping for pasta or a salad or as an elegant, yet simple, appetizer for a party!


Grilled Basil Shrimp

1lb. fresh shrimp, peeled and deveined
3 T. spicy brown mustard
3 T. lemon juice, freshly squeezed
2 T. garlic, minced
1/3 C. fresh basil, chopped
1 tsp. salt
1/2 tsp. pepper
2 1/2 T. butter, melted
2 1/2 T. extra virgin olive oil
Wooden skewers

In a small bowl, combine the mustard, lemon juice, garlic, basil, salt, pepper, melted butter, and oil. Whisk to combine well. Add the shrimp and marinate in the refrigerator 1 hour or up to overnight.

Preheat grill to medium-high heat. Remove shrimp from marinade and thread onto the wooden skewers. Discard marinade. Lightly oil grill grates and arrange skewers on grill. Grill 4-5 min., turning once, or until opaque.

*Note: Grilling really lends the best flavor. To cook indoors, saute shrimp by removing from marinade and cooking in skillet over medium-high heat for 5 mins. or until opaque, making sure to turn shrimp while cooking.

Serve with a side of linguini, over salad, or as an appetizer.

Monday, June 28, 2010

Chicken Ranch Quesadillas

Since having the baby, dinner can be a little crazy around our house. Usually, one of us has to eat fast if he's cranky or I need something quick to make on the fly. I decided last night that quesadillas not only sounded really yummy, but would be quick to make and a satisfying summer meal. It was nice to have something that didn't require an oven and heat up the house!

The quesadillas also turned out to be a great use of leftover chicken. I usually hate leftovers so this gave me the chance to make something new out of the chicken I had and it didn't disappoint!


Chicken Ranch Quesadillas

1 T. vegetable oil
6 large flour tortillas
1 1/2 C. chicken, diced
1/2 C ranch dressing
1 1/2 C. mozzarella cheese, shredded
1/2 C. fresh tomatoes, finely diced
2-3 T. cilantro, chopped
1 C. corn (I used white corn, but any type would work here!)
1/2 C. bacon

In a skillet or sautƩ pan, heat 1 T. oil over medium heat. Meanwhile, in a large pan, mix together the chicken and ranch dressing. Add the cheese, tomatoes, cilantro, corn, and bacon. Mix well. Place about 1/3 C. of the mixture on half of a tortilla. Fold over. Repeat with the remaining 5 tortillas. Working in batches, cook quesadillas until the tortillas are golden brown and the filling is melted and heated through. Cut each quesadilla into 3-4 wedges and serve.

Sunday, June 27, 2010

Frito Bean Dip

I first had this dish ay my friend Kathy's house. It's SO good. Originally it's called "Frito Bean Dip" because I think you are supposed to eat it with Frito chips. Well, it's great that way, no doubt. But, it's so good that I like to just eat it all by itself! So, whether you choose to chip it up or eat it solo, this is a delicious and MUCH healthier alternative to traditional summer side dishes. With no mayo, it can take the heat of summer parties, too.


Frito Bean Dip

1 can black eyed peas
1 can pinto beans
1 can black beans
1 can Green Giant Mexi-Corn mix
1 small can of chopped pimentos
1 small can of green chilis (diced)
1 T water
1/2 cup apple cider vinegar
1/3 cup vegetable oil
1/2 sugar
1 tsp pepper

Drain and rise all of the beans and corn. Mix together the beans, corn, pimentos and chilies.

Boil the water, vinegar, oil, sugar, and pepper until the sugar is melted.

Add the boiled mixture to the bean mixture and let it marinate for a few hours. When you are ready to serve it, drain the liquid from the beans with a slotted spoon.

Serve with fritos, tortilla chips, or whatever else strikes your fancy.

Wednesday, June 16, 2010

Homemade Caramel Popcorn

For Father's Day (or any other holiday, really), I always try to find ways to give homemade gifts. This year, my husband had a great idea for our dads. Homemade Caramel Popcorn! They both love it and you can put it in all sorts of fun containers. We went with simple, clear canisters...much more manly, I thought.

Since caramel popcorn is normally seasonal (Halloween - Christmas) it's hard to find any that's fresh and not really expensive. After doing some research, I found a great recipe. It's simple (nearly foolproof, really) which is good considering I've had some caramel-making disasters in my past. Plus, most of the ingredients are pantry staples, so you can make it all year! The bonus is that this caramel corn tastes exactly like the gourmet, super-pricey kind you can find in specialty shops around the holidays.


Homemade Caramel Popcorn

Non-stick Cooking spray
12 C. popcorn (I used the microwavable kind - it's just about 2 bags worth of popcorn)
2 C. peanuts (optional)
1 C. packed brown sugar
1/2 C. corn syrup (light or dark)
1/2 C. (1 stick) of butter
1/2 tsp. salt, plus a pinch
1/2 tsp. vanilla
1/2 tsp. baking soda


Preheat the oven to 250 degrees. Spray a large shallow roasting pan with cooking spray. Combine popcorn and nuts (if using) and set aside.

In a heavy 2 quart sauce pan mix brown sugar, corn syrup, butter, and 1/2 tsp. of salt. Stir constantly and bring to a boil over medium heat. Without stirring, boil for 5 minutes. Remove sauce pan from eat, stir in vanilla and baking soda.

Pour the syrup over popcorn (and nuts), making sure to coat each piece. The caramel hardness pretty fast, so make sure to move quickly as you pour and mix!

Bake in 250 degree oven for 60 minutes, stirring every 15 minutes. Remove from oven, sprinkle with a pinch of salt, let cool, and break popcorn apart.

Package in cute containers to give away as gifts - or just eat it all yourself...hey, I don't judge!

Monday, June 29, 2009

Blue Cheese and Carmelized Onion Galette

This was by far my favorite dish we made at our Uncle-Niece cooking day! I first had this dish at a family holiday party a few years ago. Ever since, I have been hounding my Uncle Tom to make it again. It is a great dish to make for a party because it's simple, yet makes a delicious and beautiful statement. Not only does this dish look fancy, it tastes amazing!


Blue Cheese and Onion Galette

1 pie crust (we used Pilsbury refrigerated crust to make
it easy on ourselves, but you can always make a homemade crust!)
1 T. olive oil
1 T. butter
2 medium sweet Vidalia onions halved and thinly sliced
2 t. sugar
2 T. balsamic vinegar
3/4 C. blue cheese crumbled (here we used Gorganzola, and slightly less than 3/4 C.)
2 tsp. fresh rosemary finely chopped
1/4 t. freshly ground black pepper

Heat oil and butter together in a large skillet. Add onions and sugar, cook over medium heat until caramelized, stirring often, for about 25 minutes. Stir in vinegar and stir until it evaporates, about 2 minutes.

Heat oven to 350°F. Place dough on a lightly floured surface and roll into a 12 inch circle. Place on a ungreased cookie sheet. Roll the edges in about 1 inch and flute to create a border. Sprinkle cheese over dough. Spread onions over cheese. Sprinkle with rosemary and pepper.

Bake until crust is golden brown, about 25 - 30 minutes. Slice into wedges.

Honey Balsamic Chicken Satay

This dish is a quick way to have appetizers ready for a sudden dinner guest. The marinade is quick but packed with flavor. This can also be adapted using whole chicken breasts to serve as a main dish.
Honey Balsamic Chicken Satay

1 Lb. Chicken tenderloins, cut in half
1 Tb. olive oil
4 Tbsp balsamic vinegar, divided
4 Tbsp honey
1 tsp garlic salt
1/2 tsp freshly ground pepper
10-15 bamboo skewers (one for each piece of chicken)
Heat grill to medium heat. In a ziplock bag, combine the chicken, oil, 1 Tb. vinegar, salt, and pepper. Marinate for at least 15 minutes, but up to overnight. Once marinated, skewer each piece of chicken onto a bamboo skewer. Grill until chicken is golden, and cooked through.

Meanwhile, in a small saucepan, combine the remaining vinegar and the honey. Cook, stirring often, until very thick. Coat the cooked chicken with the glaze. Serve the glaze alongside the chicken satay.

Monday, June 22, 2009

Stuffed Artichokes

This is a dish that I remember my grandma making as a kid. There's a little work required when eating them, but it's worth it! These artichokes are full of a delicious bread filling that fills your whole kitchen with beautiful smelling garlic and spices.

before cooking

after cooking

Stuffed Artichokes

4 fresh artichokes
3/4 C. Italian seasoned bread crumbs
2-3 cloves garlic, pressed or minced
1/4 C. Romano cheese, grated or shredded (can subsitute parmesan)
garlic salt
freshly ground black pepper
extra virgin olive oil (for drizzling)

Cut the stem off the bottom of the artichokes and peel off the very bottom leaves. Cut the very top off the artichokes to create a flat top. Using kitchen shears, trim away the sharp points on the remaining leaves. Whack artichokes on the counter a few times to help them open up. Go on, get that agression out - whack 'em!

In a small bowl, mix all of the filling ingredients together. Carefully separate/ spread the leaves of the artichokes. Fill with bread crumb mixture. Drizzle each artichoke with a little olive oil. In a large pan, place artichokes. Add enough water to the pan to just barely rise up the side of the artichoke, about 1/4 inch. Cover pot and simmer until the leaves in the middle pull out easily - about 40 minutes.

Thursday, June 4, 2009

BBQ Shrimp Skewers

I was looking for something quick and light to round out the appetizers for my party. This were very last minute, but so simple. The recipe calls for any BBQ dry rub that you like. I highly recommend visiting www.galenagarlic.com to look for rubs, marinates, and spices. I visited their store when seeing my niece in Galena this spring. They have a ton of unique blends. Here I used the Coffee BBQ Blend. It's slightly spicey and the coffee adds a really different flavor that people don't expect. These were the first appetizer gone!


BBQ Shrimp Skewers
50 Large shrimp, peeled and deveined
10 kabob skewers
4-6 Tbs. BBQ dry rub of your choice (I used Coffee BBQ Blend from Galena Garlic Co.)
2 Tbs. Lime juice, plus some for garnish
2 Tbs. cilantro, chopped, plus some for garnish
1 tsp. olive oil

Soak the wooden kabob skewers in water for about 20 minutes to make sure they do not burn on the grill. Skewer 5 shrimp on each kabob. (To make the appitizer go a little further, you can always cut each kabob in half and skewer 3 shrimp) Place all skewered shrimp in a 13X9 pan. In a small bowl whisk together the rub, lime juice, cilantro, and olive oil. Pour over the shrimp and let marinate 30 minutes or up to overnight.

Heat grill to medium high. Cook shrimp on one side until there are grill marks, about 3 minutes. Flip and finish cooking, about 4 minutes more. Remove from grill, sprinkle with fresh cilantro and lime juice.

Brie and Almond Tartlets with Fruit Preserves

I have always loved the combination of brie and fruit preserves in puff pastry. For our party, I wanted something easy to grab and take outside so I made a small, bite-sized version. These are really simple, but make a very classy impression. You can use any kind of preserves/jam that you like and it's sure to be a hit!


Brie and Almond Tartlets with Fruit Preserves

1 puff pastry sheet
3/4 lb. Brie cheese
1/3 C. sliced almonds
Fruit preserves/jam: I used blackberry, apricot, and raspberry

Thaw the pastry sheet at room temperature. Heat oven to 400 degrees. Unfold the pastry sheet on a lightly floured surface. Roll the sheet into a 14-inch square (doesn't have to be exact). Cut into 36 (2 1/4-inch) squares. Gently place each square into mini muffin tins.

Cut the Brie cheese into 36 pieces. Spoon about 1/4 tsp. of preserves into the bottom of each pastry square. Sprinkle with almonds, saving some for the tops of the appetizer. Top the preserves and almonds with one piece of cheese. Top with any remaining almonds.

Bake the tartlets for 15 minutes or until golden. Let cool on a wire rack, but serve warm.